Google Drive is great cloud service where you can store online or backup all your important files that you can later access wherever you are just by logging into your Gmail (Google) account and going to http://drive.google.com. You can drag and drop files to your browser while on that url or you can install their application that will sync a selected folder to the cloud. Problem is I can’t change the language on my Google Drive since there is nowhere to do so. I prefer that my Windows and all applications are in English. I have searched the Google Drive’s settings but seen nowhere to change settings but than I searched a bit more and I found rather simple solution.
Before you start you should close Google Drive.
Then you need to go to Control Panel -> System -> Advanced System Settings -> Advanced -> Environment Variables.
Then on user variables press New button for Variable name enter LANG and for value enter en_US.
Restart the Google Drive and it should work now in English.
Easy as a pie!
Here’s a screenshot of the windows that might help you find your way trough:

Tags: change google drive language, how to change language in google drive, change google drive to english, how to change google drive language, change google drive language to english, google drive flushed away, how to change language on google drive, chANGE LANGUAGE GOOGLE DRIVE, google drive superbad english
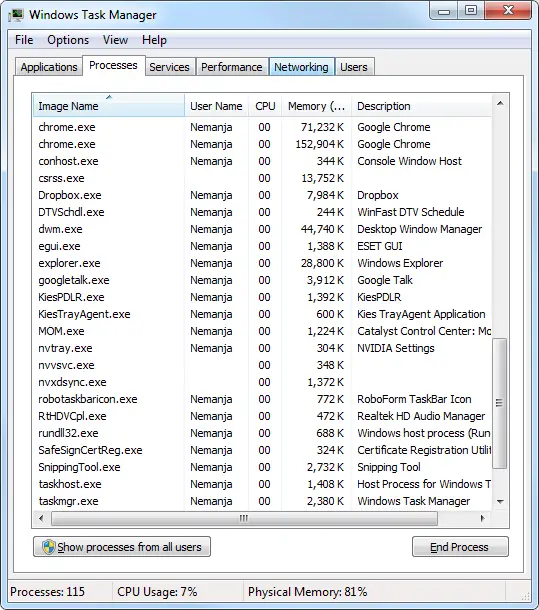
Today something weird happened. I started up my computer and clicked on Chrome icon – and nothing. I click again nothing… This is weird… I start up Windows Task Manager and then I click again Chrome icon and I monitor Processes list at Windows Task Manager and chrome.exe doesn’t come up… So I start up Total Commander and go to c:\Users\USER\AppData\Local\Google\Chrome\Application\ and there is chrome.exe and there is debug.log. I start the chrome.exe and nothing again. In debug.log I’ve noticed lots of lines like this one:
[0214/035118:ERROR:client_util.cc(315)] Failed to load Chrome DLL from 0029F7E0
[0214/035118:ERROR:client_util.cc(356)] Could not find exported function RelaunchChromeBrowserWithNewCommandLineIfNeeded
Also I see two directories above: /16.0.912.77 and /17.0.963.46. So this looks to me like some update gone wrong. I start Opera and start searching a at Google on how to solve this since I don’t want to loose all my logins, bookmarks etc… Few minutes later I have found a simple solution that worked but not fully… To solve this problem I had to copy the chrome.exe from /application folder into /application/17.0.963.43 folder (newer version folder). Then by running chrome.exe from that directory did start a browser but when I click on a Key (settings in Chrome) and go to “About Google Chrome” I can see error message “Update server not available (error: 1)” that means that my Chrome will not update itself in future.
So I went to FileHorse.com and downloaded the latest version of Google Chrome and at the moment it was 19.0.1036.7 and I start the chrome_installer.exe I just downloaded and nothing happens…. No installation stuff, nothing… Well I know Google guys like minimalism but this was nothing… but in my Google Application folder I see two new things: new folder /19.0.1036.7 and new file new_chrome.exe. So after trying few more things I found the solution. I had to delete old chrome.exe and rename new one from new_chrome.exe to chrome.exe and it was finally it!!! Chrome was working, update at about page is again saying “Google Chrome is up to date (19.0.1036.7)”.
Ok but why did this happen?
Well I started searching the web and I found out that this happened because of using Chromium or Chrome portable. And I’ve been using/trying both! So one of those probably started auto-update and than used settings stored in registry from my installed Chrome and messed it all up. So my advice for you today is: DO NOT use Chrome along with Chrome Portable or Chromium Portable or any other browser running on Chromium open-source platform!
Tags: could not find exported function relaunchchromebrowserwithnewcommandlineifneeded, chrome not launching, Could not get Chrome DLL version, chrome will not launch, Google Chrome Not Launching, RelaunchChromeBrowserWithNewCommandLineIfNeeded, failed to load chrome DLl, could not get chrome dll version could not find exported function relaunchchromebrowserwithnewcommandlineifneeded, yhs-fullyhosted_003, google chrome will not launch, Couldn\t mmap icu data file, chrome is not launching, couldnt launch Chrome try again, yhs-fh_lsonsw, Couldnt mmap icu data file, block ad doubleclick net windows 7, couldn\t launch chrome try again, chrome enterprise could not launch chrome, ctrl alt delete screen, chrome Couldnt mmap icu data file, chrome browser not launching, chrome does not launch, ERROR:client_util cc(315)
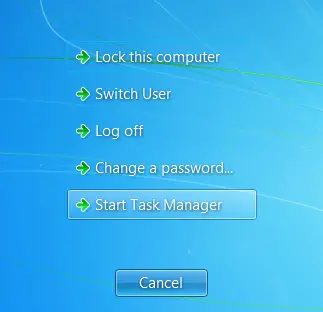
In order to get to Windows Task Manager using CTRL + ALT + DEL shows you screen (with following options: Lock this computer, Switch User, Log Off, Change Password, Start Task Manager):
Some times getting to that screen is not easy and it takes a lot of time especially if some application is stuck or it’s using all CPU power or allocated lots of memory.
But there’s are two quicker ways to do start Windows Task Manager directly, without that blue screen, that is really slow sometimes.
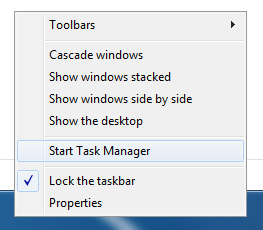
1. Right-click on empty space in your Windows 7 taskbar and select “Task Manager”, like on the picture below:
2. Press CTRL + SHIFT+ ESC. The result will be the same: Windows Task Manager will start:
Tags: ctrl alt del windows 7, ctrl alt del, windows 7 CTrl Alt Delete Screen, ctrl alt del screen windows 7, windows 7 CTRL ALT DEL screenshot
 Everyone of us probably has hundreds if not thousands of images taken with his digital camera or cell phone. When viewing these pictures on computer (or TV) you will find that lots of pictures needs to be rotated to be displayed correctly. Doing this by hand can really take some time. Luckily, I have found an easier way of solving this problem. It’s also very fast and easy to use!
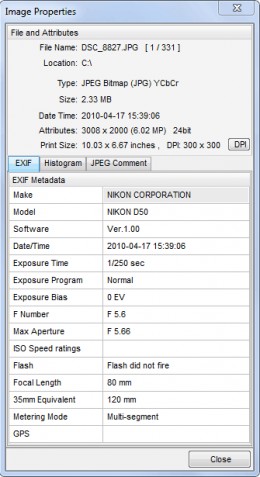
Most of modern digital cameras (and cellphones) save many extra data to JPEG. That’s called EXIF data. Many useful information about how the picture was taken is stored in there. In sample I provided on the right you can see part of the EXIF data saying that the picture was made using my Nikon D50, that I didn’t use the flash and that exposure time is 1/250 sec and that focal length was 80mm. Beside that, there are many other details that are not displayed in this sample, and among those is Orientation tag that says how the camera was positioned in time of shooting.
Some programs use that Orientation data to auto-rotate the images for you when viewing them – some do not.
Our mission is to rotate multiple images in batch using exif orientation without loss of quality. For that purpose I will use FastStone Image Viewer that you can download from my favorite software download site FileHorse.com. This software is free for personal use (professionals should buy a license). It’s really amazing piece of software for image manipulation (viewing, converting, cropping, re-sizing, watermarking – you name it!) and it’s very light weight one so it will run smooth even on lower spec computer.
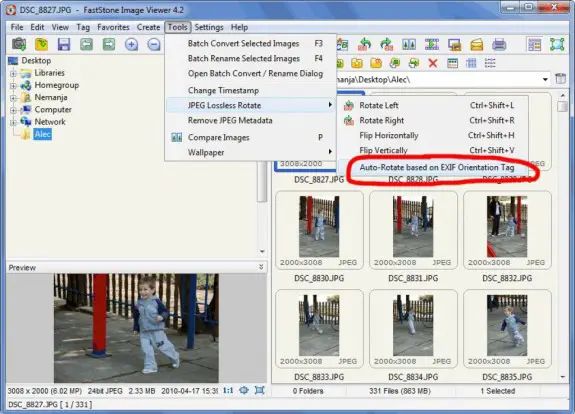
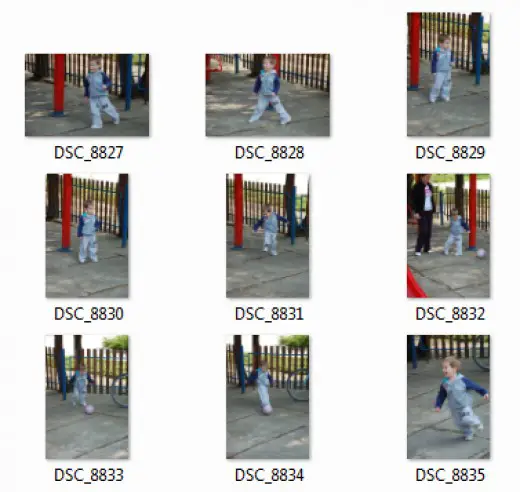
Ok, once you’ve downloaded, installed and started FastStone Image Viewer, you need to find images that you need to rotate. Once in folder with images select them by pressing CTRL+A and then go to Tools – > JPEG Lossless Rotate -> Auto-Rotate based on EXIF Orientation Tag just like on picture above. A popup will ask you are you sure you want to do it, press yes and wait until your photos are auto rotated (if you have lots of photos or slower computer it can take some time to process them all). It’s easy as 1-2-3! Take a look at the samples below:
Before Rotation

After Rotation
Feel free to leave your comments in the comment box below!
Making awesome business card is really important if you want to leave a good impression to people you plan doing business with. Here’s one great, 100% geek, business card idea…

Tags: Business card Ideas, visit card, business cards ideas, awesome business cards