After cPanel upgrade from EasyApache3 to EasyApache4 all my CodeIgniter installations just broke on that server, returning just a white page without any error message. I spent more than one hour trying to figure out what the problem is. While testing out I noticed empty files named like these “0bce68a7a37e584ace98f0fd242a237d1662613e” or “296eed9bfb533552b0c3a9c8fdd784067eea216d” (without any extension) started popping in my project folder. I figured out that these must be session paths so something is wrong with that.
I tried enabling php error logging but it didn’t help since it didn’t log anything since all code is right and it was working before but it just stopped after I started using EasyApache4.
So I went and enabled CodeIgniter logging that proved to be a better idea. To enable it open config.php for editing, locate
$config['log_threshold'] = 0;
And change that value to 4. That will enable internal logging system and logs will be saved in /application/logs folder. What I found out just conf
ERROR - 2016-11-29 22:36:29 --> Severity: Warning --> mkdir(): Invalid path Session_files_driver.php 117
ERROR - 2016-11-29 22:36:29 --> Severity: error --> Exception: Session: Configured save path '' is not a directory, doesn't exist or cannot be created. Session_files_driver.php 119
My session save path at config.php was set to null:
$config['sess_save_path'] = NULL;
Once I got it changed to default (alternatively you can set it up to any other folder you want locally, so you can have full control over your sessions):
$config['sess_save_path'] = sys_get_temp_dir();
everything started working again! Now this is second time I have similar quiet errors with CodeIgniter where it reports absolutely nothing – instead it just gives white screen and this can be really frustrating to debug.
Today I wanted to install Git on a server with cPanel/WHM and have got the following result:
yum install git
Resolving Dependencies
--> Running transaction check
---> Package git.x86_64 0:1.7.1-4.el6_7.1 will be installed
--> Processing Dependency: perl-Git = 1.7.1-4.el6_7.1 for package: git-1.7.1-4.el6_7.1.x86_64
--> Processing Dependency: perl(Git) for package: git-1.7.1-4.el6_7.1.x86_64
--> Processing Dependency: perl(Error) for package: git-1.7.1-4.el6_7.1.x86_64
--> Finished Dependency Resolution
Error: Package: git-1.7.1-4.el6_7.1.x86_64 (base)
           Requires: perl-Git = 1.7.1-4.el6_7.1
Error: Package: git-1.7.1-4.el6_7.1.x86_64 (base)
           Requires: perl(Git)
Error: Package: git-1.7.1-4.el6_7.1.x86_64 (base)
           Requires: perl(Error)
 You could try using --skip-broken to work around the problem
 You could try running: rpm -Va --nofiles --nodigest
Then I did some research and have found out that Gis is already installed on cPanel as of version 11.36 but the problem is – it’s installed on this path:
/usr/local/cpanel/3rdparty/bin/git
So for ease of use I advise you to make a simple symlink:
ln -s /usr/local/cpanel/3rdparty/bin/git /usr/bin/git
so you don’t have to remember the path above and you can simply use it like you got used.
Note: In order for user to be able to login to SSH, it must be allowed in WHM first at Account Functions > Manage Shell Access and there just switch from Disabled Shell to Jailed Shell.
Happy Gitting!
If your /boot partition is running out of disk space this is probably because you got bunch of old Linux kernels that got stockpiled there and are no longer in use or needed for system to function normally. If you’re running a WHM/cPanel you’ll get an email with subject: DISKWARN blocks: Mount Point “/boot”
Usually on a system update, if there is a new Linux Kernel it will get downloaded and initialized while the last one will be kept for just in case the first one fails for any reason. In couple of months or years you could already have 5-6 of them while only the latest Linux kernel would be in use and the previous one will be kept as a backup. Removing these by hand is possible but an mistake could end up with a system that won’t boot.
To prevent that and free up disk space at /boot partition on Red Hat Linux or CentOS Linux all you need to do is simply to execute this command:
sudo yum install yum-utils && sudo package-cleanup --oldkernels --count=2
This will remove all your old kernels keeping just the last two (latest one and the previous one just in case) so you won’t get these emails or notifications anymore and you’ll keep your /boot partition with enough free space for a new kernel to be installed once released.
So, this is actually the part 2 of my problems concerning DigitalOcean WordPress 1-click-app and JetPack (about the first issue you can read here). If you read my first post you found out what I had to do in order to activate the Jetpack. All seemed fine and I could see the stats from WordPress installed on DigitalOcean droplet on my WordPress.com account and even some of the active things were working (like Photon or Contact Form).
But, when I wanted to turn on some of the Jetpack modules that I have previously turned off (or that were turned off by default) it didn’t work. For example I wanted to turn off and then turn back on JSON API at General settings tab. When I turned it off it looked like it “worked” (no error messages) but when I wanted to turn it back on I was getting following error message (and the slider won’t go to active position):
JSON API failed to activate. SyntaxError: Unexpected toket < in JSON at position 0

When trying to activate some other Jetpack module I would also get this error:
SyntaxError: JSON Parse error: Unrecognized token ‘<‘” error
I was also unable to disconnect the Jetpack using the WordPress.com account and this was only possible if I would disable Jetpack at plugins and re-enable it again. Then I would have to re-connect it with my WordPress account and it’s a loop but the results were the same. It didn’t work!
I have contacted Jetpack support but their help was similar to Microsoft support (restart the computer and try again), or in Jetpack case: disable all plugins and try reconnecting again. Since Jetpack support was unable to help me after we have exchanged couple of emails I have decided to dig deeper into this on my own. DigitalOcean community also wasn’t helpful since I found just one comment about someone having the same problem as I do but there were no reply or solution.
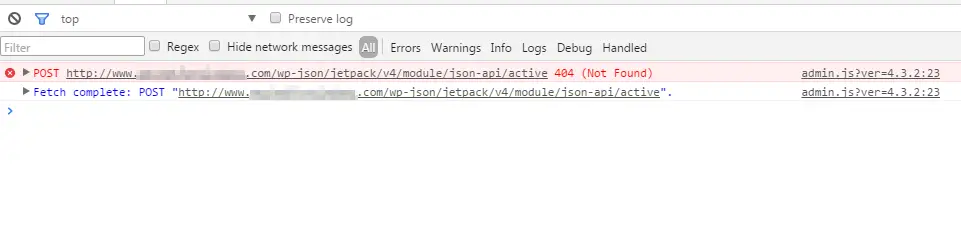
So I have opened Chrome debugger and have noticed that when I try to activate the JSON API it actually tries to make a POST call to url: /wp-json/jetpack/v4/module/json-api/activate:
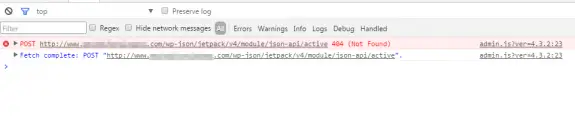
and the result is 404 – the standard 404 page! Since there files on that path and WordPress installation doesn’t have wp-json folder at all I figured out that this is mod_rewrite path so I knew in what direction to focus my exploration. I’d like to mention here that this also happened on brand new, zero days blogs, no plugins installed, default theme: basically on out of the box WordPress installations. Also permalinks worked so mod_rewrite was working normally (or it appeared to be working normally), and that made the situation even more confusing.
Out of pure despair I tried re-enabling mod_rewrite and restarting apache:
sudo a2enmod rewrite
sudo service apache2 restart
And it FU*KIN WORKED!!!
I have tired this on my other 5 or 6 sites hosted on DigitalOcean and it worked on all of them! I hope that some one from Jetpack or some geeks from DigitalOcean will see this post. I’d love to hear more about this issue. How is possible that mod_rewrite is working without being enabled on Apache or if it’s enabled why it doesn’t work for Jetpack plugin? I’m puzzled and I’d like some explanation.
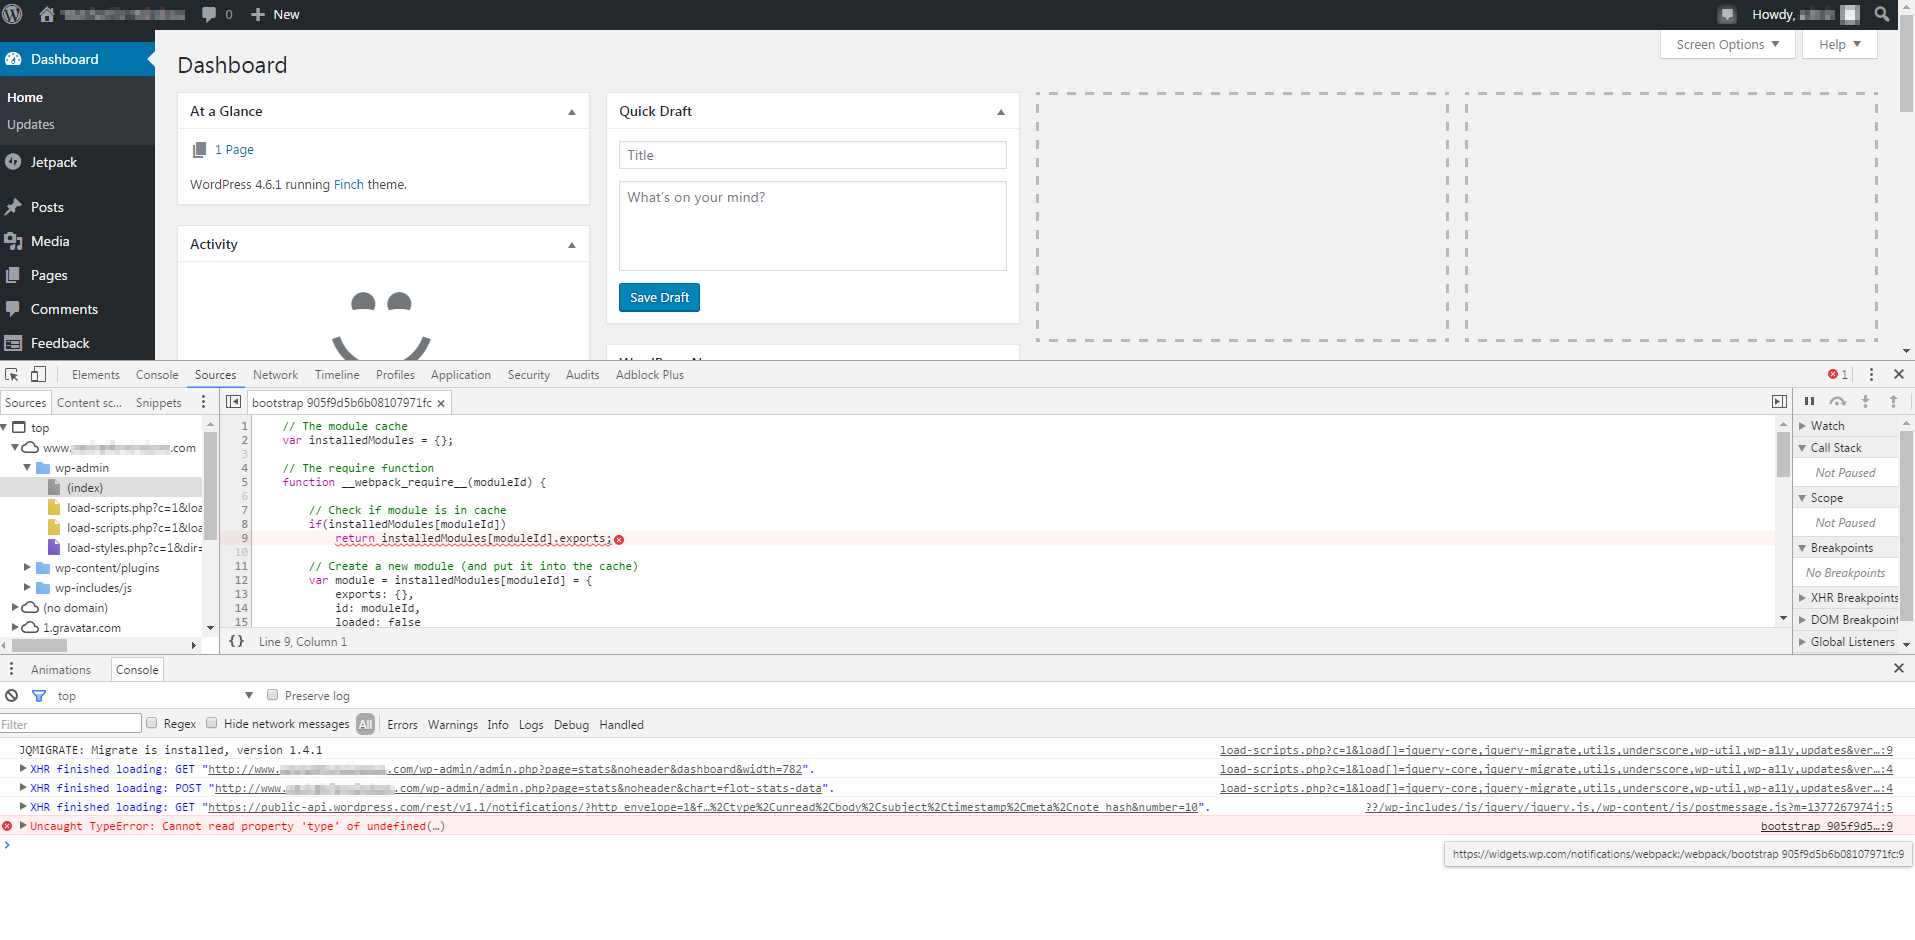
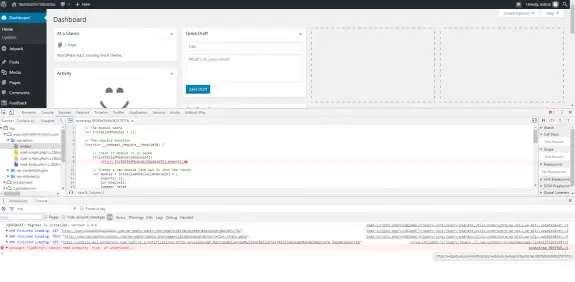
Also I have one more bug that I don’t know how to solve. When I login to these WordPress admins I have this error on every (admin) page I load in my debugger:
Uncaught TypeError: Cannot read property ‘type’ of undefined(…)
This traces back to https://widgets.wp.com/notifications/webpack:/webpack/bootstrap_905f… as you can see in detail on this screenshot:
Update: 05th December 2016
Now Jetpack is works normally on my DigitalOcean droplets, but on some occasions while setting up the Jetpack options I saw this message: Warning! Multibyte support missing!

This means that multi-byte support php module was not installed. To get it installed simply install package php-mbstring using apt-get (or yum in case you’re using CentOS/RHEL Linux), restart Apache and you’re good to go!
sudo apt-get install php-mbstring
sudo service apache2 restart
PHP multibyte should now be installed and these messages should no longer appear.
If you click on the image and hit the Align Center icon inside the editor, it will give to that image a class named “aligncenter” (or left “alignleft” and right to be “alignright” in case you align it left or right) and it will look good in the editor. In some cases once you save the changes and go to check how the image looks on the site you can notice that it’s not properly aligned and instead of being centered your image is right aligned.
This issue occurs on some themes while it works fine on the other (it works nice on the default WordPress theme) and the reason for that is that the theme doesn’t define these aligncenter (or alignleft and alignright) classes in CSS. These are introduced with WordPress 2.5 so some older themes are usually lack this and thus don’t work as expected.
There are some workarounds to solve this issue, but the best one is to just edit default styles.css and add the following css classes in it:
/* =WordPress Core
-------------------------------------------------------------- */
.alignnone {
    margin: 5px 20px 20px 0;
}

.aligncenter,
div.aligncenter {
    display: block;
    margin: 5px auto 5px auto;
}

.alignright {
    float:right;
    margin: 5px 0 20px 20px;
}

.alignleft {
    float: left;
    margin: 5px 20px 20px 0;
}

a img.alignright {
    float: right;
    margin: 5px 0 20px 20px;
}

a img.alignnone {
    margin: 5px 20px 20px 0;
}

a img.alignleft {
    float: left;
    margin: 5px 20px 20px 0;
}

a img.aligncenter {
    display: block;
    margin-left: auto;
    margin-right: auto
}

.wp-caption {
    background: #fff;
    border: 1px solid #f0f0f0;
    max-width: 96%; /* Image does not overflow the content area */
    padding: 5px 3px 10px;
    text-align: center;
}

.wp-caption.alignnone {
    margin: 5px 20px 20px 0;
}

.wp-caption.alignleft {
    margin: 5px 20px 20px 0;
}

.wp-caption.alignright {
    margin: 5px 0 20px 20px;
}

.wp-caption img {
    border: 0 none;
    height: auto;
    margin: 0;
    max-width: 98.5%;
    padding: 0;
    width: auto;
}

.wp-caption p.wp-caption-text {
    font-size: 11px;
    line-height: 17px;
    margin: 0;
    padding: 0 4px 5px;
}

/* Text meant only for screen readers. */
.screen-reader-text {
	clip: rect(1px, 1px, 1px, 1px);
	position: absolute !important;
	height: 1px;
	width: 1px;
	overflow: hidden;
}

.screen-reader-text:focus {
	background-color: #f1f1f1;
	border-radius: 3px;
	box-shadow: 0 0 2px 2px rgba(0, 0, 0, 0.6);
	clip: auto !important;
	color: #21759b;
	display: block;
	font-size: 14px;
	font-size: 0.875rem;
	font-weight: bold;
	height: auto;
	left: 5px;
	line-height: normal;
	padding: 15px 23px 14px;
	text-decoration: none;
	top: 5px;
	width: auto;
	z-index: 100000; /* Above WP toolbar. */
}
You can add the code anywhere in the file, but the end of the file is probably your safe bet. Once you save the changes you can reload the site and your images should now be aligned same way as in your editor.