If you’re a web developer developing in local environment you most probably use .dev for projects you are working on. If you’re using Valet on Mac development is quite simple since every folder from your projects folder is instantly accessible in browser if you just enter folder name and add .dev. It works like magic without messing with any hosts files. It just works!
But then Google decided to complicate things a bit. First they have forced all .dev domains to use SSL. Since December 2017 Google Chrome version 63 started redirecting to all .dev domains to secure protocol replacing http:// with https:// in your urls without even asking you. The reason for that is maybe somehow related to fact that Google bought the .dev making it a legit gTLD. They don’t sell these (yet) and the use for this, and for more than 100 other gTLD Google now owns (including .app, .foo), is unknown but for sure it’s going to complicate lives of web developers.
Continue Reading →
Three days ago Laravel 5.4 was released, so I have decided to give it a try. I have made a new Laravel 5.4 project and just when I was about to run the default auth migrations that are shipped with the Laravel almost without any other changes, I got these two red errors:
[Illuminate\Database\QueryException]
SQLSTATE[42000]: Syntax error or access violation: 1071 Specified key was too long; max key length is 767 bytes (SQL: alter table `users` add unique `users_email_unique`(`email`))
[PDOException]
SQLSTATE[42000]: Syntax error or access violation: 1071 Specified key was too long; max key length is 767 bytes
What the hell is going on!?!? I have checked the migrations file and everything was okay there unchanged compared to Laravel 5.3. But, according to Laravel Documentation one thing changed:
Laravel 5.4 uses the utf8mb4 character set by default, which includes support for storing “emojis” in the database. If you are upgrading your application from Laravel 5.3, you are not required to switch to this character set.
And, according to their documentation the problem is that I’m running version of MySQL prior to 5.7.7 or MariaDB prior to 10.2.2 (my case). In case you are running versions of MySQL or MariaDB greater than these than most probably that you won’t have this problem at all.
In case you are having this problem – here are the possible solutions:
1. Upgrade MariaDB / MySQL
To update MariaDB on Mac using Brew, first you need to unlink the current one using:
brew unlink mariadb
and then install a dev one using
brew install mariadb --devel
That will install MariaDB version 10.2.3 that works fine. Remember that after installation is done you need to stop/start the service:
brew services stop mariadb
brew services start mariadb
2. Stick with utf8
In case you don’t want to use the utf8mb4 (that is now setup by default in Laravel 5.4) – instead you want to stick with utf8 that was in use in Laravel 5.3 and all versions before, simply edit /config/database.php and find these two lines in mysql driver:
'charset' => 'utf8mb4',
'collation' => 'utf8mb4_unicode_ci',
and replace them with with
'charset' => 'utf8',
'collation' => 'utf8_unicode_ci',
That will stop using the utf8mb4 and will change back to utf8. The good thing about this is that you’ll be able to fit 25% more characters into the same columns in database compared with utf8mb4 and that you’ll be able to use existing databases and projects without the need of converting them if you don’t want to. And the downside is that some characters will not be able to be saved to database like this mac command character ⌘ or some emojis. Utf8 can only store Plane Unicode while utf8mb4 can store any unicode character. Utf8mb4 is also 100% backwards compatible with utf8.
3. Use utf8mb4 without MySQL/MariaDB upgrade
In case you want to use utf8mb4 but you don’t want to or simply can’t upgrade your MySQL/MariaDB there is a simple solution proposed by Laravel documentation. All you need to do is edit AppServiceProvider located at App\Providers\AppServiceProvider.php and add the following line to the boot() method and load the Schema facade:
use Illuminate\Support\Facades\Schema;

/**
 * Bootstrap any application services.
 *
 * @return void
 */
public function boot()
{
    Schema::defaultStringLength(191);
}
What that will do is actually change the default maximum field length in the database and actually shorten your maximum string length from 255 to maximum of 191 characters (utf8 uses 3 bytes per character while utf8mb4 uses 4 bytes per character your field can now hold 25% less characters 255 * 75% = 191.25). So if you don’t set the string field by hand in the migration the new default will be 191. You can increase the length if you need it manually by defining it:
$table->string('name', 255);
But this will not be possible on indexed fields since these can’t be longer than 191 characters. So keep this in mind in case you’re planing to use utf8mb4.
In case you want to convert the database from utf8 to utf8mb4 for any existing projects or if you are upgrading from Larvel 5.3 or older to Laravel 5.3 this is the code you need to run for every database, table and column:
Make sure you have the database backups before making these changes!!!!
# For each database:
ALTER DATABASE database_name CHARACTER SET = utf8mb4 COLLATE = utf8mb4_unicode_ci;

# For each table:
ALTER TABLE table_name CONVERT TO CHARACTER SET utf8mb4 COLLATE utf8mb4_unicode_ci;

# For each column:
ALTER TABLE table_name CHANGE column_name column_name VARCHAR(191) CHARACTER SET utf8mb4 COLLATE utf8mb4_unicode_ci;

# (Don’t just blindly copy-paste this! The exact statement depends on the column type, maximum length, and other properties. The above line is just an example for a `VARCHAR` column.)
Once again: when converting from utf8 to utf8mb4, the maximum length of a column or index key is unchanged in terms of bytes but since utf8mb4 uses 25% more bytes per character your columns can now accept less characters. Therefore, it is smaller in terms of characters, because the maximum length of a character is now four bytes instead of three.
For example, a TINYTEXT column can hold up to 255 bytes, which correlates to 85 three-byte or 63 four-byte characters. Let’s say you have a TINYTEXT column that uses utf8 but must be able to contain more than 63 characters. Given this requirement, you can’t convert this column to utf8mb4 unless you also change the data type to a longer type such as TEXT — because if you’d try to fill it with four-byte characters, you’d only be able to enter 63 characters, but not more.
The same goes for index keys. The InnoDB storage engine has a maximum index length of 767 bytes, so for utf8 or utf8mb4 columns, you can index a maximum of 255 or 191 characters, respectively. If you currently have utf8 columns with indexes longer than 191 characters, you will need to index a smaller number of characters when using utf8mb4.
If you plan on using utf8mb4 make sure to setup your MySQL server accordingly by editing /etc/my.cnf file accordingly:
[client]
default-character-set = utf8mb4

[mysql]
default-character-set = utf8mb4

[mysqld]
character-set-client-handshake = FALSE
character-set-server = utf8mb4
collation-server = utf8mb4_unicode_ci
Conclusion
If your application won’t use any special characters or emojis or languages such as Chinese, Japanese, and Korean you’re most probably fine sticking with utf8. But if you can – you should move to utf7mb4 since that will stop you from loosing 4-byte characters when a user ads these in comments or in message or whenever you store these in your database. You should always strive to full unicode support everywhere in your apps and updating your database and code might take some time but it’s definitely worth the time and effort.
After cPanel upgrade from EasyApache3 to EasyApache4 all my CodeIgniter installations just broke on that server, returning just a white page without any error message. I spent more than one hour trying to figure out what the problem is. While testing out I noticed empty files named like these “0bce68a7a37e584ace98f0fd242a237d1662613e” or “296eed9bfb533552b0c3a9c8fdd784067eea216d” (without any extension) started popping in my project folder. I figured out that these must be session paths so something is wrong with that.
I tried enabling php error logging but it didn’t help since it didn’t log anything since all code is right and it was working before but it just stopped after I started using EasyApache4.
So I went and enabled CodeIgniter logging that proved to be a better idea. To enable it open config.php for editing, locate
$config['log_threshold'] = 0;
And change that value to 4. That will enable internal logging system and logs will be saved in /application/logs folder. What I found out just conf
ERROR - 2016-11-29 22:36:29 --> Severity: Warning --> mkdir(): Invalid path Session_files_driver.php 117
ERROR - 2016-11-29 22:36:29 --> Severity: error --> Exception: Session: Configured save path '' is not a directory, doesn't exist or cannot be created. Session_files_driver.php 119
My session save path at config.php was set to null:
$config['sess_save_path'] = NULL;
Once I got it changed to default (alternatively you can set it up to any other folder you want locally, so you can have full control over your sessions):
$config['sess_save_path'] = sys_get_temp_dir();
everything started working again! Now this is second time I have similar quiet errors with CodeIgniter where it reports absolutely nothing – instead it just gives white screen and this can be really frustrating to debug.
So, this is actually the part 2 of my problems concerning DigitalOcean WordPress 1-click-app and JetPack (about the first issue you can read here). If you read my first post you found out what I had to do in order to activate the Jetpack. All seemed fine and I could see the stats from WordPress installed on DigitalOcean droplet on my WordPress.com account and even some of the active things were working (like Photon or Contact Form).
But, when I wanted to turn on some of the Jetpack modules that I have previously turned off (or that were turned off by default) it didn’t work. For example I wanted to turn off and then turn back on JSON API at General settings tab. When I turned it off it looked like it “worked” (no error messages) but when I wanted to turn it back on I was getting following error message (and the slider won’t go to active position):
JSON API failed to activate. SyntaxError: Unexpected toket < in JSON at position 0

When trying to activate some other Jetpack module I would also get this error:
SyntaxError: JSON Parse error: Unrecognized token ‘<‘” error
I was also unable to disconnect the Jetpack using the WordPress.com account and this was only possible if I would disable Jetpack at plugins and re-enable it again. Then I would have to re-connect it with my WordPress account and it’s a loop but the results were the same. It didn’t work!
I have contacted Jetpack support but their help was similar to Microsoft support (restart the computer and try again), or in Jetpack case: disable all plugins and try reconnecting again. Since Jetpack support was unable to help me after we have exchanged couple of emails I have decided to dig deeper into this on my own. DigitalOcean community also wasn’t helpful since I found just one comment about someone having the same problem as I do but there were no reply or solution.
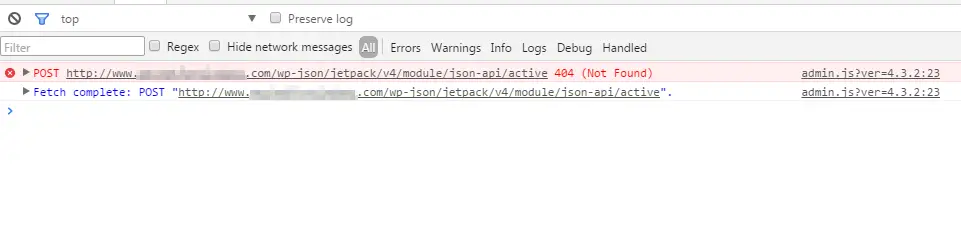
So I have opened Chrome debugger and have noticed that when I try to activate the JSON API it actually tries to make a POST call to url: /wp-json/jetpack/v4/module/json-api/activate:
and the result is 404 – the standard 404 page! Since there files on that path and WordPress installation doesn’t have wp-json folder at all I figured out that this is mod_rewrite path so I knew in what direction to focus my exploration. I’d like to mention here that this also happened on brand new, zero days blogs, no plugins installed, default theme: basically on out of the box WordPress installations. Also permalinks worked so mod_rewrite was working normally (or it appeared to be working normally), and that made the situation even more confusing.
Out of pure despair I tried re-enabling mod_rewrite and restarting apache:
sudo a2enmod rewrite
sudo service apache2 restart
And it FU*KIN WORKED!!!
I have tired this on my other 5 or 6 sites hosted on DigitalOcean and it worked on all of them! I hope that some one from Jetpack or some geeks from DigitalOcean will see this post. I’d love to hear more about this issue. How is possible that mod_rewrite is working without being enabled on Apache or if it’s enabled why it doesn’t work for Jetpack plugin? I’m puzzled and I’d like some explanation.
Also I have one more bug that I don’t know how to solve. When I login to these WordPress admins I have this error on every (admin) page I load in my debugger:
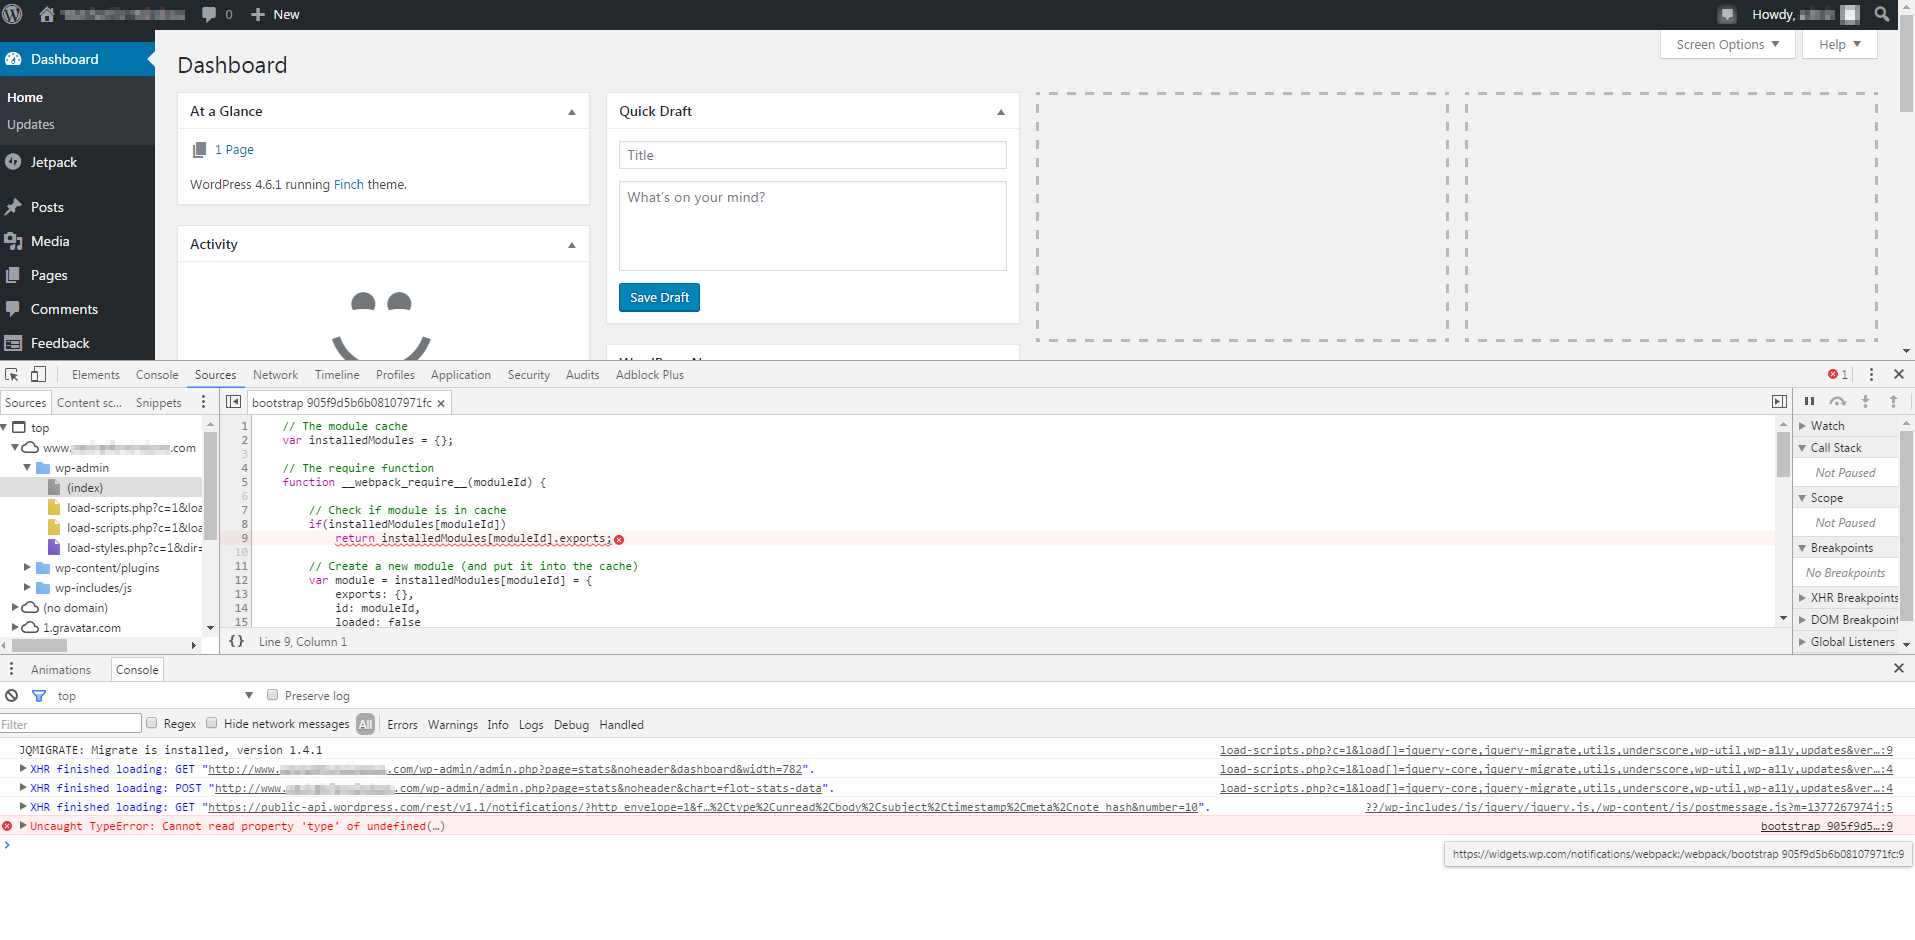
Uncaught TypeError: Cannot read property ‘type’ of undefined(…)
This traces back to https://widgets.wp.com/notifications/webpack:/webpack/bootstrap_905f… as you can see in detail on this screenshot:
Update: 05th December 2016
Now Jetpack is works normally on my DigitalOcean droplets, but on some occasions while setting up the Jetpack options I saw this message: Warning! Multibyte support missing!

This means that multi-byte support php module was not installed. To get it installed simply install package php-mbstring using apt-get (or yum in case you’re using CentOS/RHEL Linux), restart Apache and you’re good to go!
sudo apt-get install php-mbstring
sudo service apache2 restart
PHP multibyte should now be installed and these messages should no longer appear.