How to safely install git on cPanel/WHM?
GIT is popular version control system for software development and it’s really common today. Installation on servers without cPanel is pretty simple but on servers that do have cPanel can be tricky because git installs it’s own Perl libraries and that can cause many problems and conflicts and often results in unusable WHM server in the end.
So whatever you do – do not install GIT!
I repeat: DO NOT INSTALL GIT ON WHM SERVER!
Because it’s already installed 🙂
It’s just not in path and you can’t use it.
There are two ways of doing this:
1. WHM/root way that will make git available to all users on the system
2. cPanel way that will make git available only for the current account
Hot to enable it in WHM?
To make git usable to all users (with ssh access) just execute this single line of code as root:
ln -s /usr/local/cpanel/3rdparty/bin/git /usr/local/bin/git
How to enable it in cPanel?
If you are using a shared (or reseller) hosting powered by cPanel (and you don’t have WHM access) than you need to login using SSH and locate your .bashrc file. It should be in your home directory. Open that file for editing and add git to your path by adding following two lines of code at the end of your .bashrc file:
PATH=$PATH:/usr/local/cpanel/3rdparty/bin
export PATH
To edit that file enter: nano .bashrc
After you add these two lines your .bashrc file should look like this:
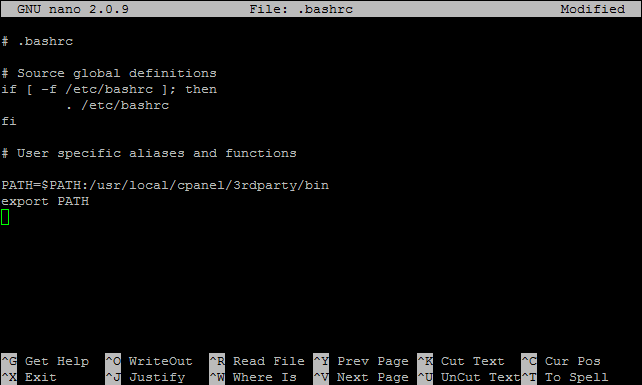
To save the changes press CTRL+X , then press Y and Enter. In order for changes to be accepted it will be necessary to re-log in to your SSH command prompt.
How to check if git now works on cPanel?
Well, that’s really simple. Just login to SSH and execute: git –version
and that should return git version (currently cPanel git is version 2.6.1)
That’s it!
Nice and simple.
Happy giting…