DigitalOcean S3 compatible object storage called Spaces allows you to store and serve large amounts of data. They are easy to create and are ready to be used within seconds without any configuration. They are ideal for storing static unstructured data like audio, video and images as well as binary files, archives, backups etc.
What’s so cool about Spaces compared to Amazon S3 is the fact that their pricing structure is WAY more easier to understand and predict. For $5/month you get 250 GB of storage and 1 TB of outbound transfer (inbound/upload is always free). Every additional GB stored costs $0.02 and every additional GB transferred costs $0.01. On top of that you can even serve these files utilizing use their free CDN service at no additional cost! (This alone on Amazon CloudFront can cost you a little fortune!).
Now back to the main topic: mounting DigitalOcean Space as a folder on your server that can be used to store any kind of data.
For the past several years I have been using Amazon S3 to backup my WHM/cPanel accounts. It works quite good but the problem is Amazon’s complex pricing model (that charges you for things like diskspace, bandwidth, requests) making price for the service is quite unpredictable. I’ve read on many places that people often got surprised at the end of the month receiving the bill from Amazon.
Recently I have started testing DigitalOcean Spaces, a service similar to Amazon’s S3 (S3 compatible alternative) but with a pricing structure anyone can understand: for $5/month you get 250 GB of storage and 1 TB of outbound transfer (inbound transfer is free like on S3). If you need more than that it will cost you 2cents per every additional GB of storage and 1cent for every additional of outbound GB. Also first two months for every new space are free!
While experimenting with s3fs I have also found out another tool written in go programming language that named Goofys. Like s3fs, this tool can also mount Amazon S3 bucket as a folder that can later be accessed just like any other local folder making accessing files in S3 bucket, backing up data or syncing files quite easy. Detailed installation manual for Goofys covers only Mac while Linux installation guide is basically non-existing, so this will be my guide on how to install Goofys and mount Amazon S3 bucket on an Ubuntu Linux. This has been tested on DigitalOcean droplet running a Ubuntu version 16.04.3 x64. If you’re also testing this out on a new VPS like me – make sure to execute apt-get update before you start.
But why would anyone want to use Goofys if s3fs is working fine? Well, according to benchmarks available at Goofys github main reason you would like to use this is performance! Goofys is much faster than s3fs. For some operations Goofys is ten times faster than s3fs making it the right choice for situations when you need access to S3 to be really fast (or as close as it being just a folder on the same drive).
How to install Go language on Ubuntu Linux?
As mentioned above Goofy is written in GO so we need to install GO in order to use Goofy. Installing go requires you to download the latest version from https://golang.org/dl/ unpack it:
<code># Download Go language binary
wget https://storage.googleapis.com/golang/go1.9.3.linux-amd64.tar.gz

# Unpack the downloaded fole to /usr/local
tar -C /usr/local -xvzf go1.9.3.linux-amd64.tar.gz

# Remove the archive
rm go1.9.3.linux-amd64.tar.gz

# Create the Go language work directories
mkdir -p /go/projects/goofys/{bin,pkg,src}</code>
No create this file path.sh at /etc/profile.d path
<code>vi /etc/profile.d/path.sh</code>
copy paste the line below, save the changes and exit:
AWS CLI is required by Goofy and installation is pretty straight forward:
<code>apt-get install awscli</code>
How to install Gooofy on Ubuntu Linux?
Once Go language is installed correctly, installing Goofy is quite simple. All you need to do is simply execute these two commands:
<code>go get github.com/kahing/goofys
go install github.com/kahing/goofys</code>
At this point Goofy should be installed and in order to use it we need to save
Setting up Amazon S3 credentials
To allow AWS CLI to access your S3 buckets create store credentials at this file:
<code># Make the hidden folder that holds the AWS credentials file
mkdir ~/.aws

# Create and start editing the credentials file
vi ~/.aws/credentials</code>
Don’t forget to copy/paste your actual AWS access and secret keys above. Save and exit once you’re done.
Check if AWS S3 is working
To verify if the credentials are right and that you have entered them correctly, list all the buckets using:
<code>aws s3 ls</code>
The response should show the list of available buckets.
For this test I have created a new bucket called GeekTnT
Mounting a Amazon S3 bucket with Gooofy
Now let’s create a folder where we will mount our bucket. For the purpose of this post we’ll create a folder /backup and we’ll mount GeekTnT bucket on it.
<code># Creates a backup folder
mkdir /backup
# Mount a GeekTNT.com bucket to a /backup folder
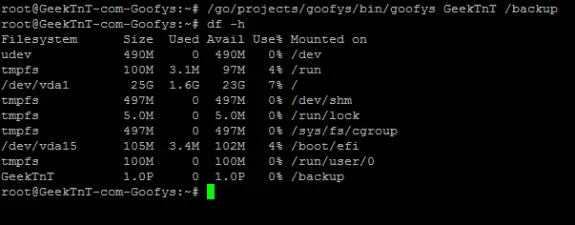
/go/projects/goofys/bin/goofys GeekTnT /backup</code>
And the final result is that now we have an s3 bucket mounted to our /backup folder with basically unlimited disk space (1PB) that we can use to store data or backups.
Unmounting the S3 bucket is simple. Just execute:
<code>umount /backup</code>
Checking if it actually works
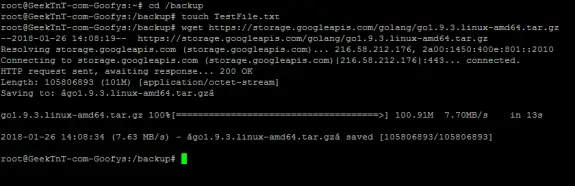
Everything seems fine – but does it work. To test that out I’ll create a file in /backup folder and since this is a new DigitalOcean droplet and I have no bigger files that I can copy, I’ll download a Go language installation file directly into /backup folder.
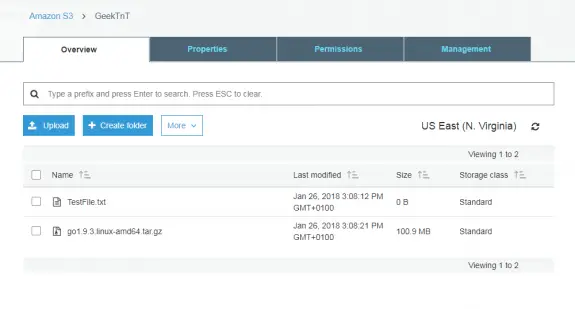
If everything works these should automatically be available inside Amazon’s console.
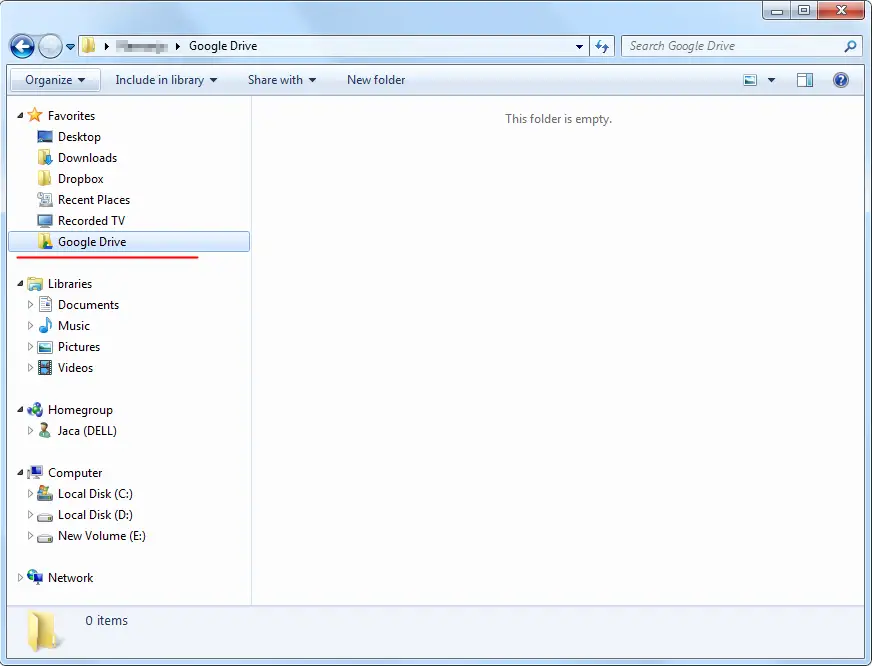
If you’re using Google Drive it’s default path is c:\User\USER_NAME\Google Drive\ but often my partition on c: is quite small since I only use it for operating system and I store all my data on other drives. So I’d like Google Drive to backup my data on other drive and still allow me to access it in my user’s folder. The idea is to create a symbolic link so that C:\User\USER_NAME\Google Drive\ links to e:\Backup in my case (or some other path in your case).
First close (quit) the Google Drive application.
1. Now you need to go and remove directory and all it’s files from C:\User\USER_NAME\Google Drive\ (or simply rename the folder or copy all files to your 2nd backup folder on other drive).
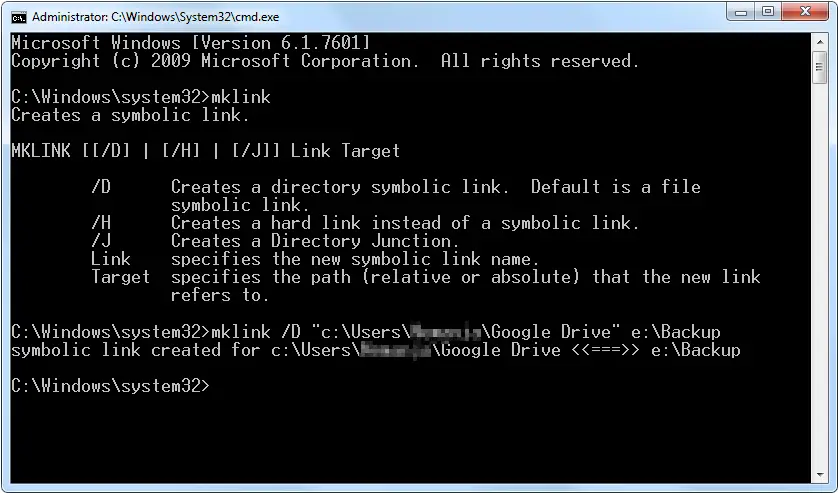
2. Than you need to run CMD as Administrator – see the picture below how:
3. Then you need to make Smbolic link. But not a shortcut link than directory redirect link, entering mklink /D “c:\Users\USER_NAME\Google Drive” e:\Backup
If your backup path contains spaces put it in double quotes too like the fist path.
Google Drive is great cloud service where you can store online or backup all your important files that you can later access wherever you are just by logging into your Gmail (Google) account and going to http://drive.google.com. You can drag and drop files to your browser while on that url or you can install their application that will sync a selected folder to the cloud. Problem is I can’t change the language on my Google Drive since there is nowhere to do so. I prefer that my Windows and all applications are in English. I have searched the Google Drive’s settings but seen nowhere to change settings but than I searched a bit more and I found rather simple solution.
Before you start you should close Google Drive.
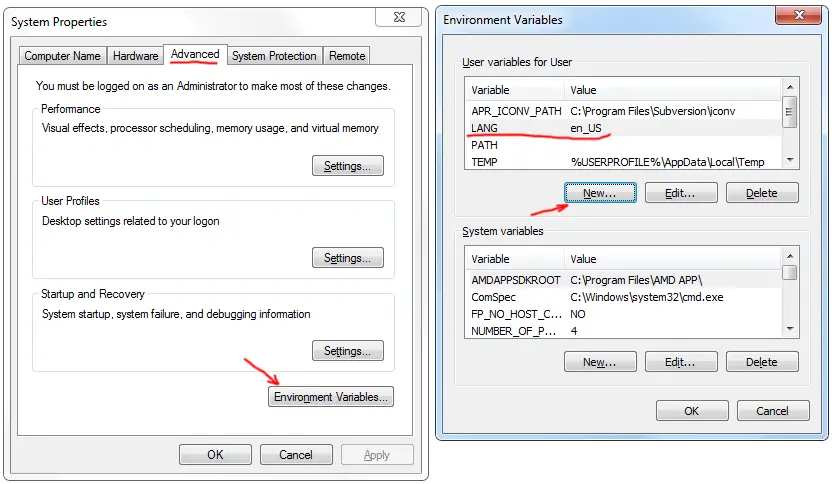
Then you need to go to Control Panel -> System -> Advanced System Settings -> Advanced -> Environment Variables.
Then on user variables press New button for Variable name enter LANG and for value enter en_US.
Restart the Google Drive and it should work now in English.
Easy as a pie!
Here’s a screenshot of the windows that might help you find your way trough: Tags: change google drive language, how to change language in google drive, change google drive to english, how to change google drive language, change google drive language to english, google drive flushed away, how to change language on google drive, chANGE LANGUAGE GOOGLE DRIVE, google drive superbad english

