There are two ways to install IonCubeLoader on cPanel. The standard way includes recompiling Apache using EasyApache from WHM (or shell) and it takes 10-30 minutes to complete and results in Apache restart in the end.
But there’s also a quick way: just login to SSH and execute this command, wait a minute and that’s it!
/scripts/phpextensionmgr install IonCubeLoader
If your server returns unknow host errors when you try to ping some website, or wget returns unable to resolve host address, it’s most probably that you don’t have a valid DNS settings in /etc/resolv.conf
wget: unable to resolve host address downloads.sourceforge.net
ping: unknown host downloads.sourceforge.net
If you’r host didn’t provided their nameservers that you can use – you can use one provided by OpenDNS.net.
All you need to do is edit file /etc/resolv.comf and add their nemeservers into the file:
nameserver 208.67.220.220
nameserver 208.67.222.222
Save the changes and you’re ready to go!
(No need to restart anything)
I have just got my Samsung Galaxy S4 and I have noticed that it has imported all of the pictures and albums from Goole Picasa to my gallery. I find that very anoying and I was looking for a way how to stop it from doing it so. Here’s how to solve it.
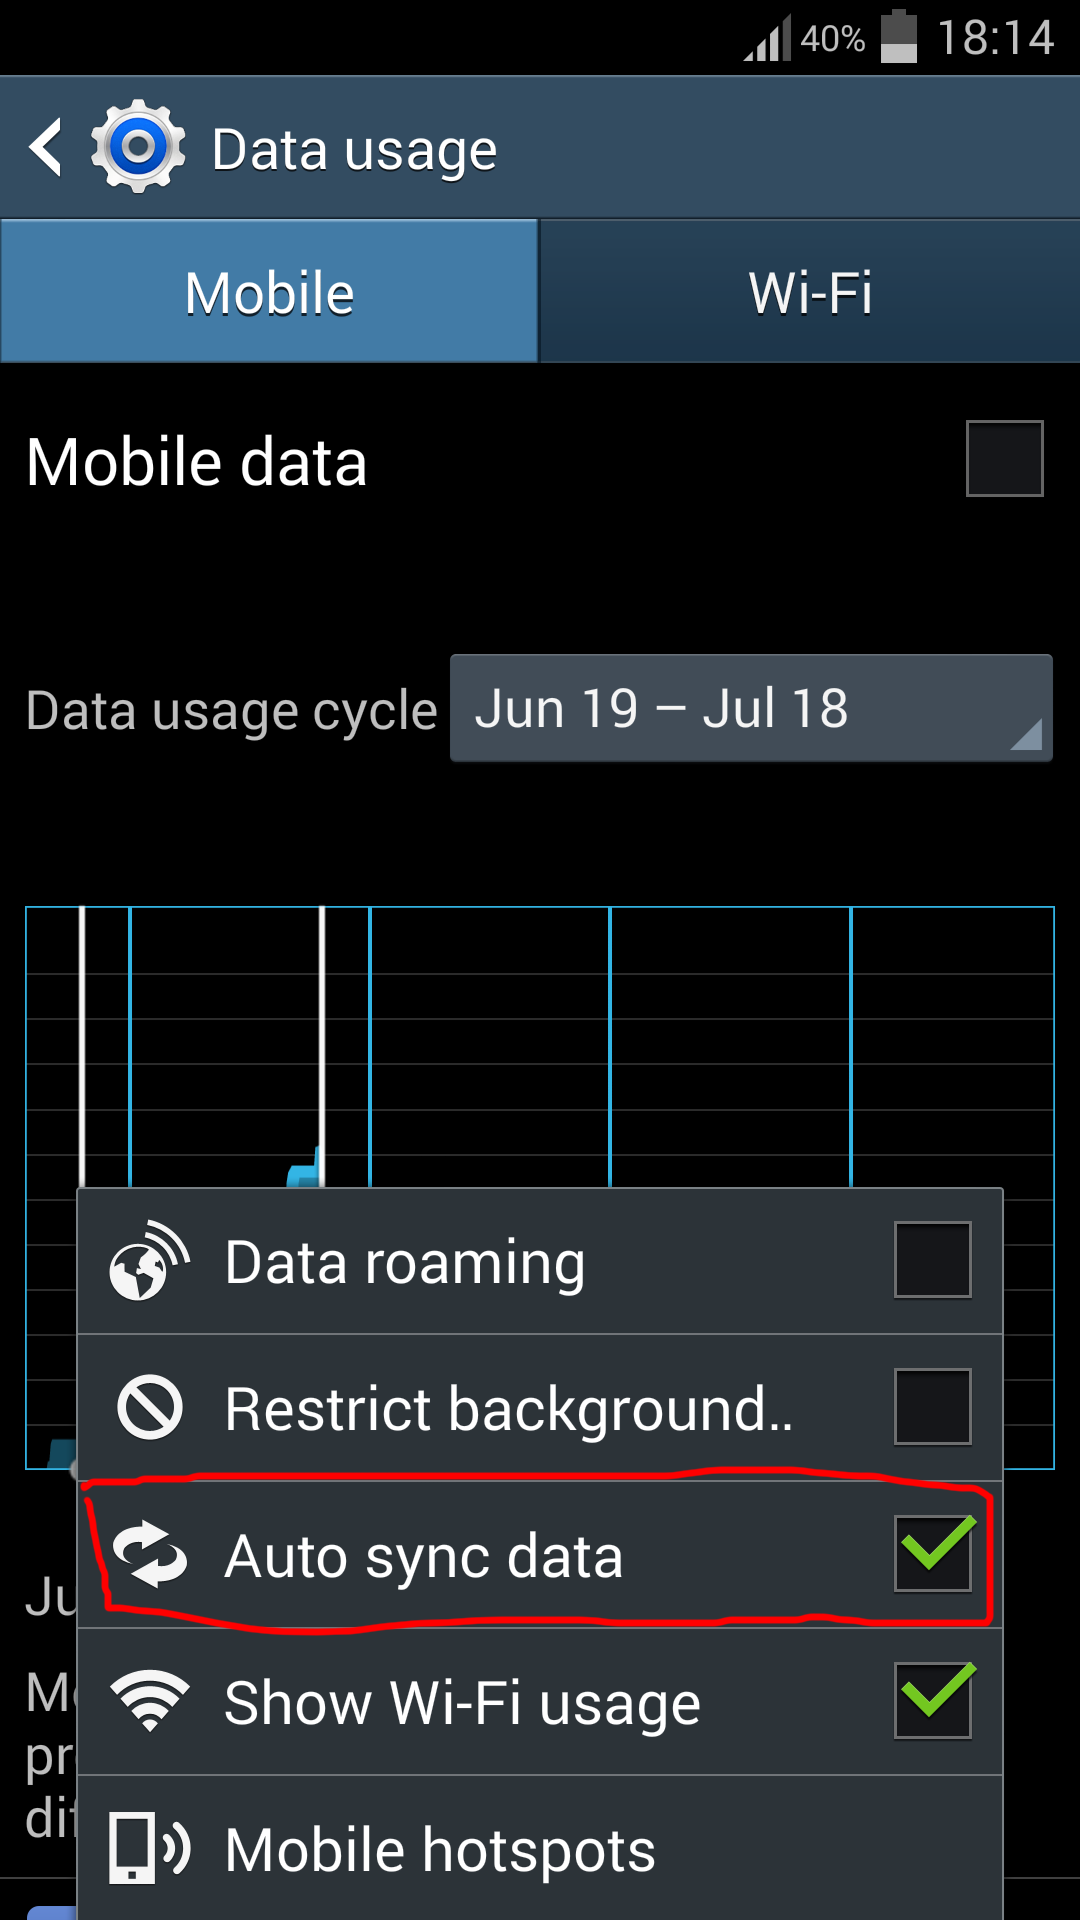
First check if auto data sync is enabled:
1. Go to Settings and at Connections tab select Data Usage
2. In properties enable Auto sync Data (To get the properties click on the button on the left side from your Home button on your phone at the bottom right side)
After that’s done let’s disable the Picasa
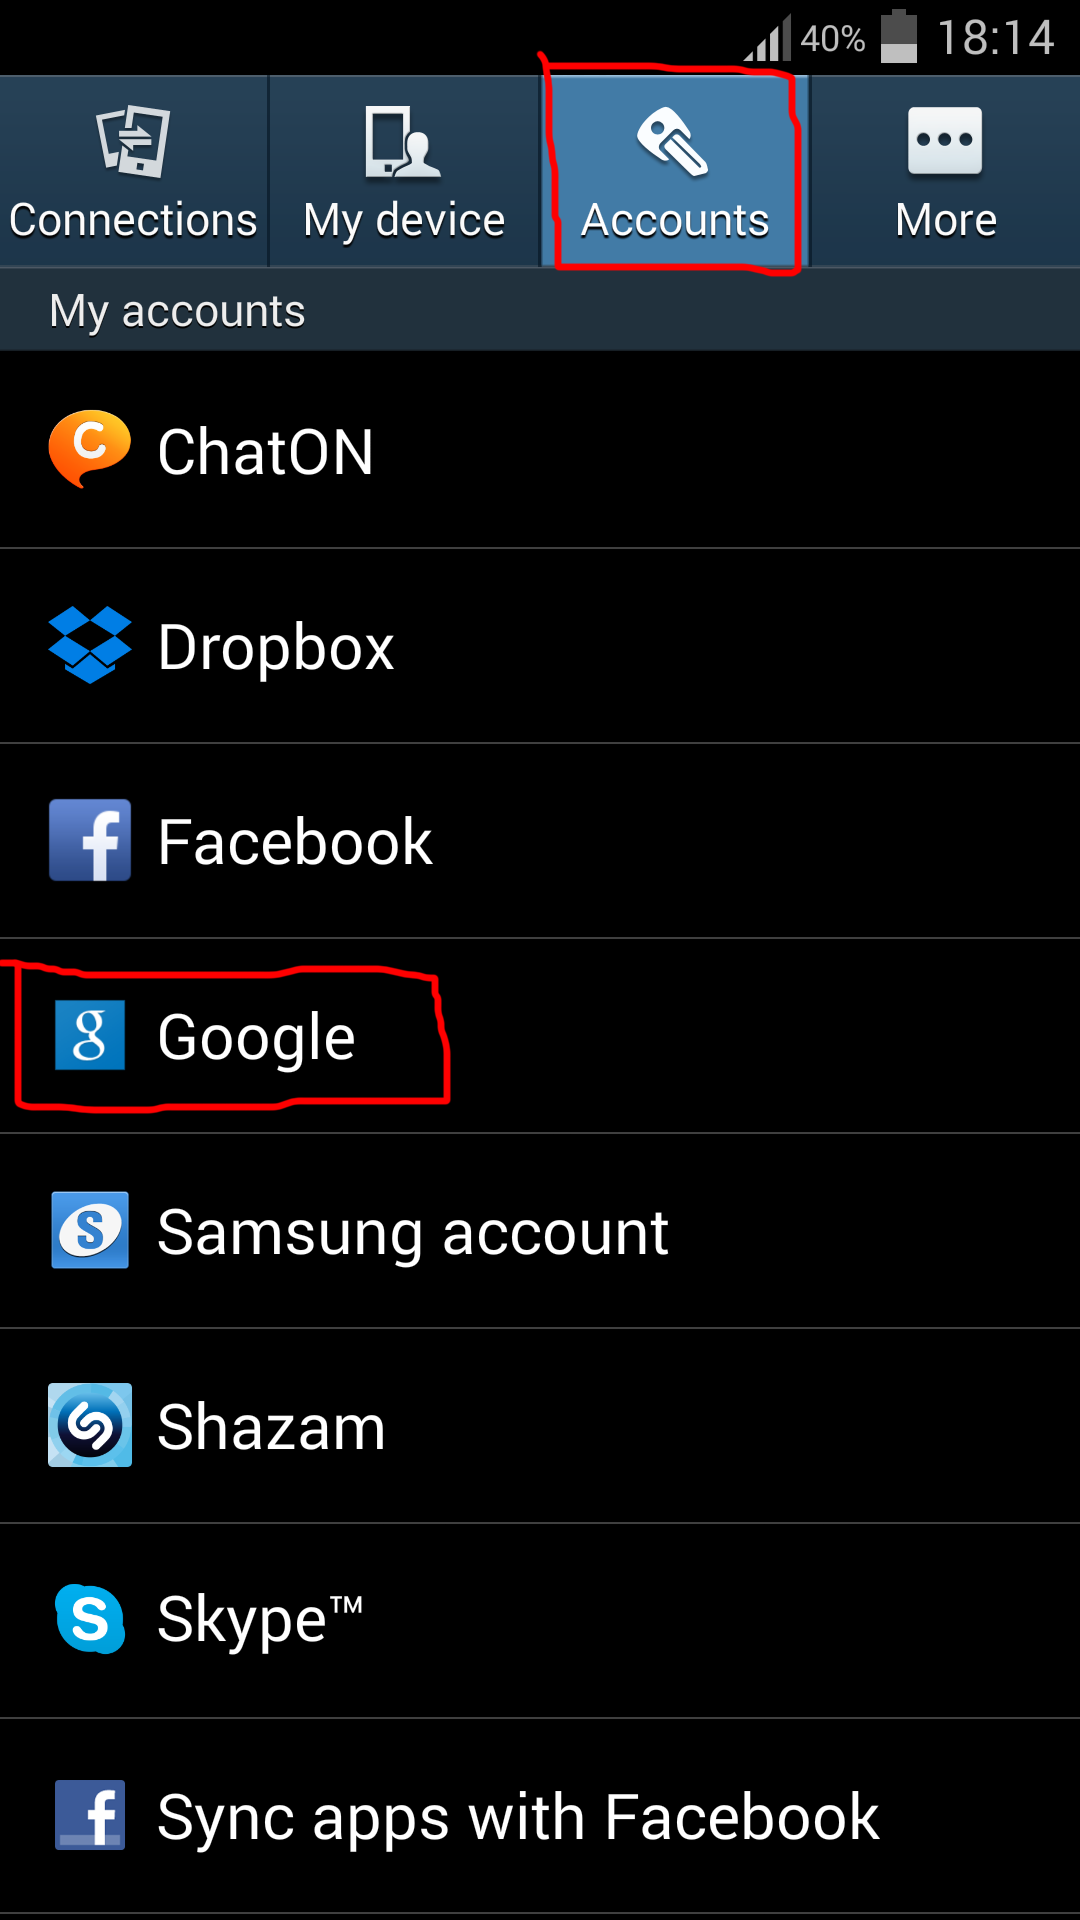
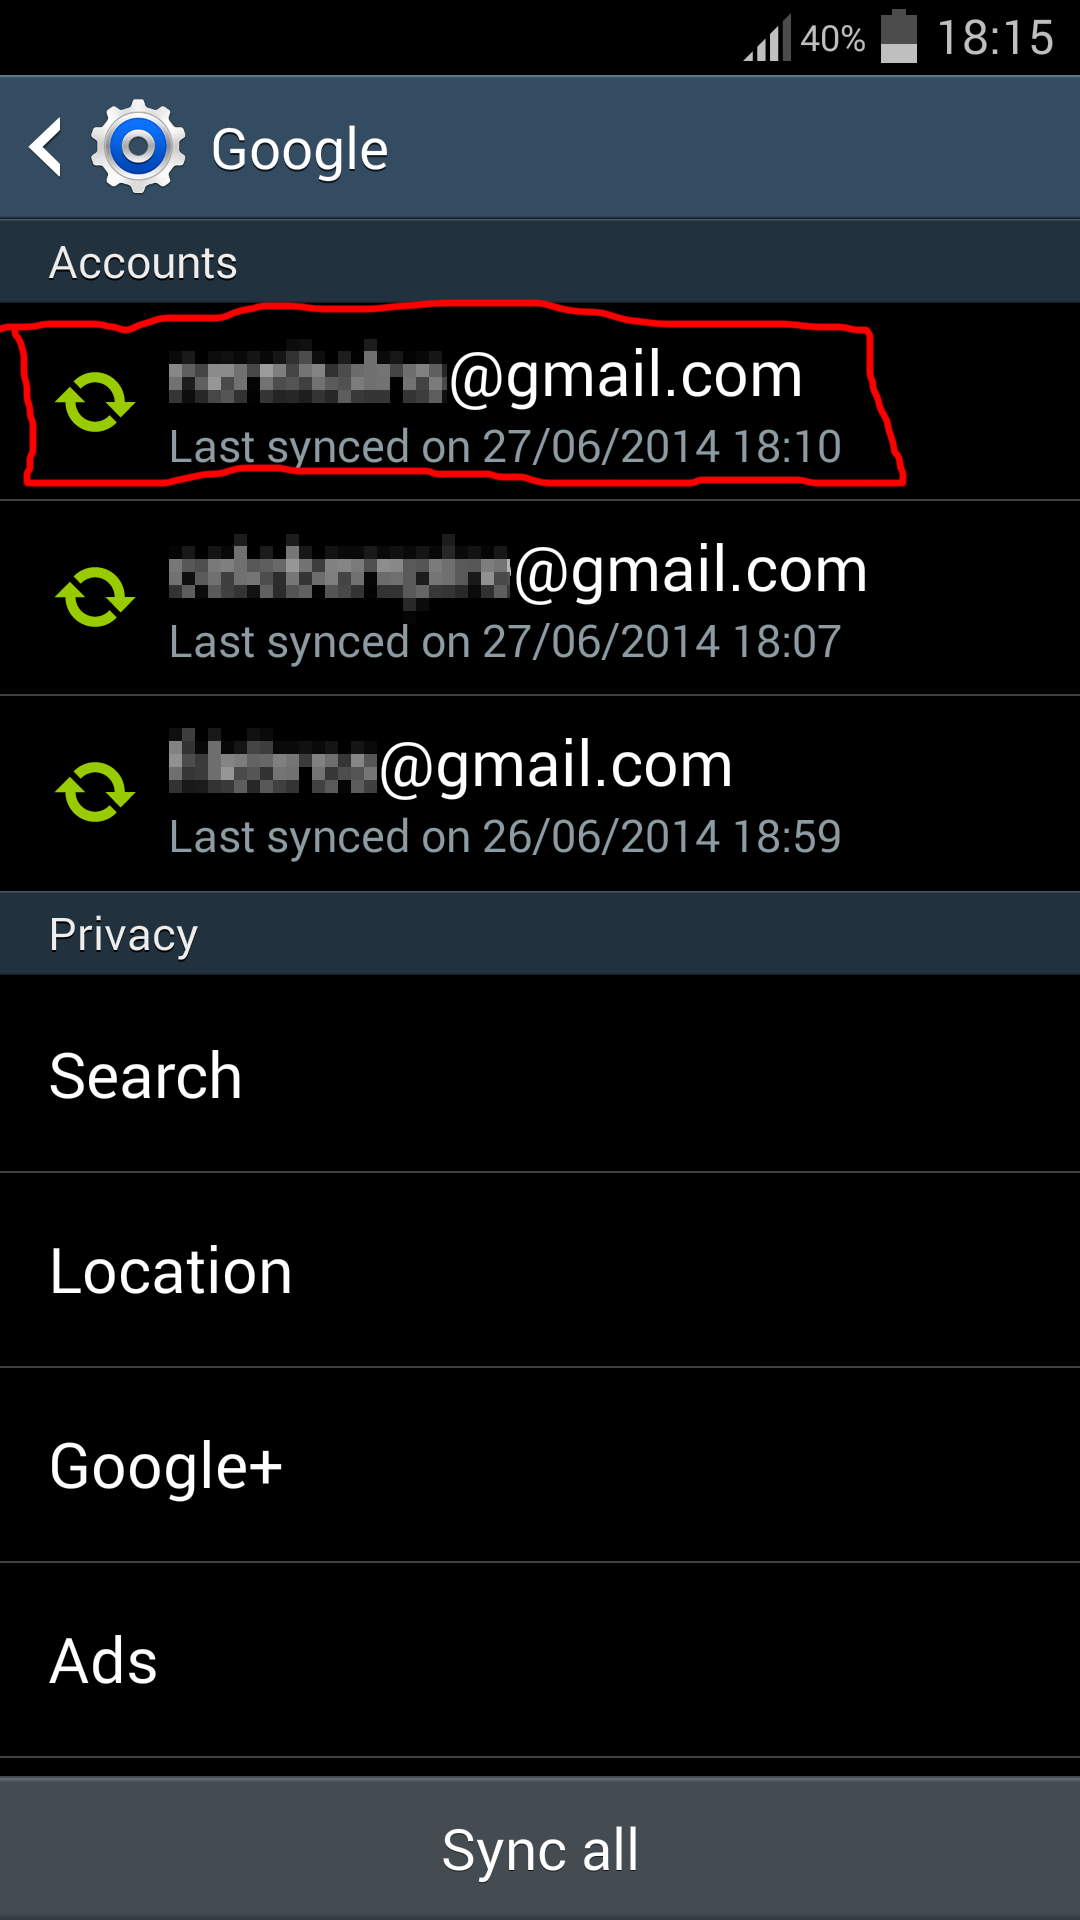
1. Go to Settings and at Accounts tab select Google and then select your Gmail account (most of you have only one, I have three and if you have more than one repeat the following step for every account)
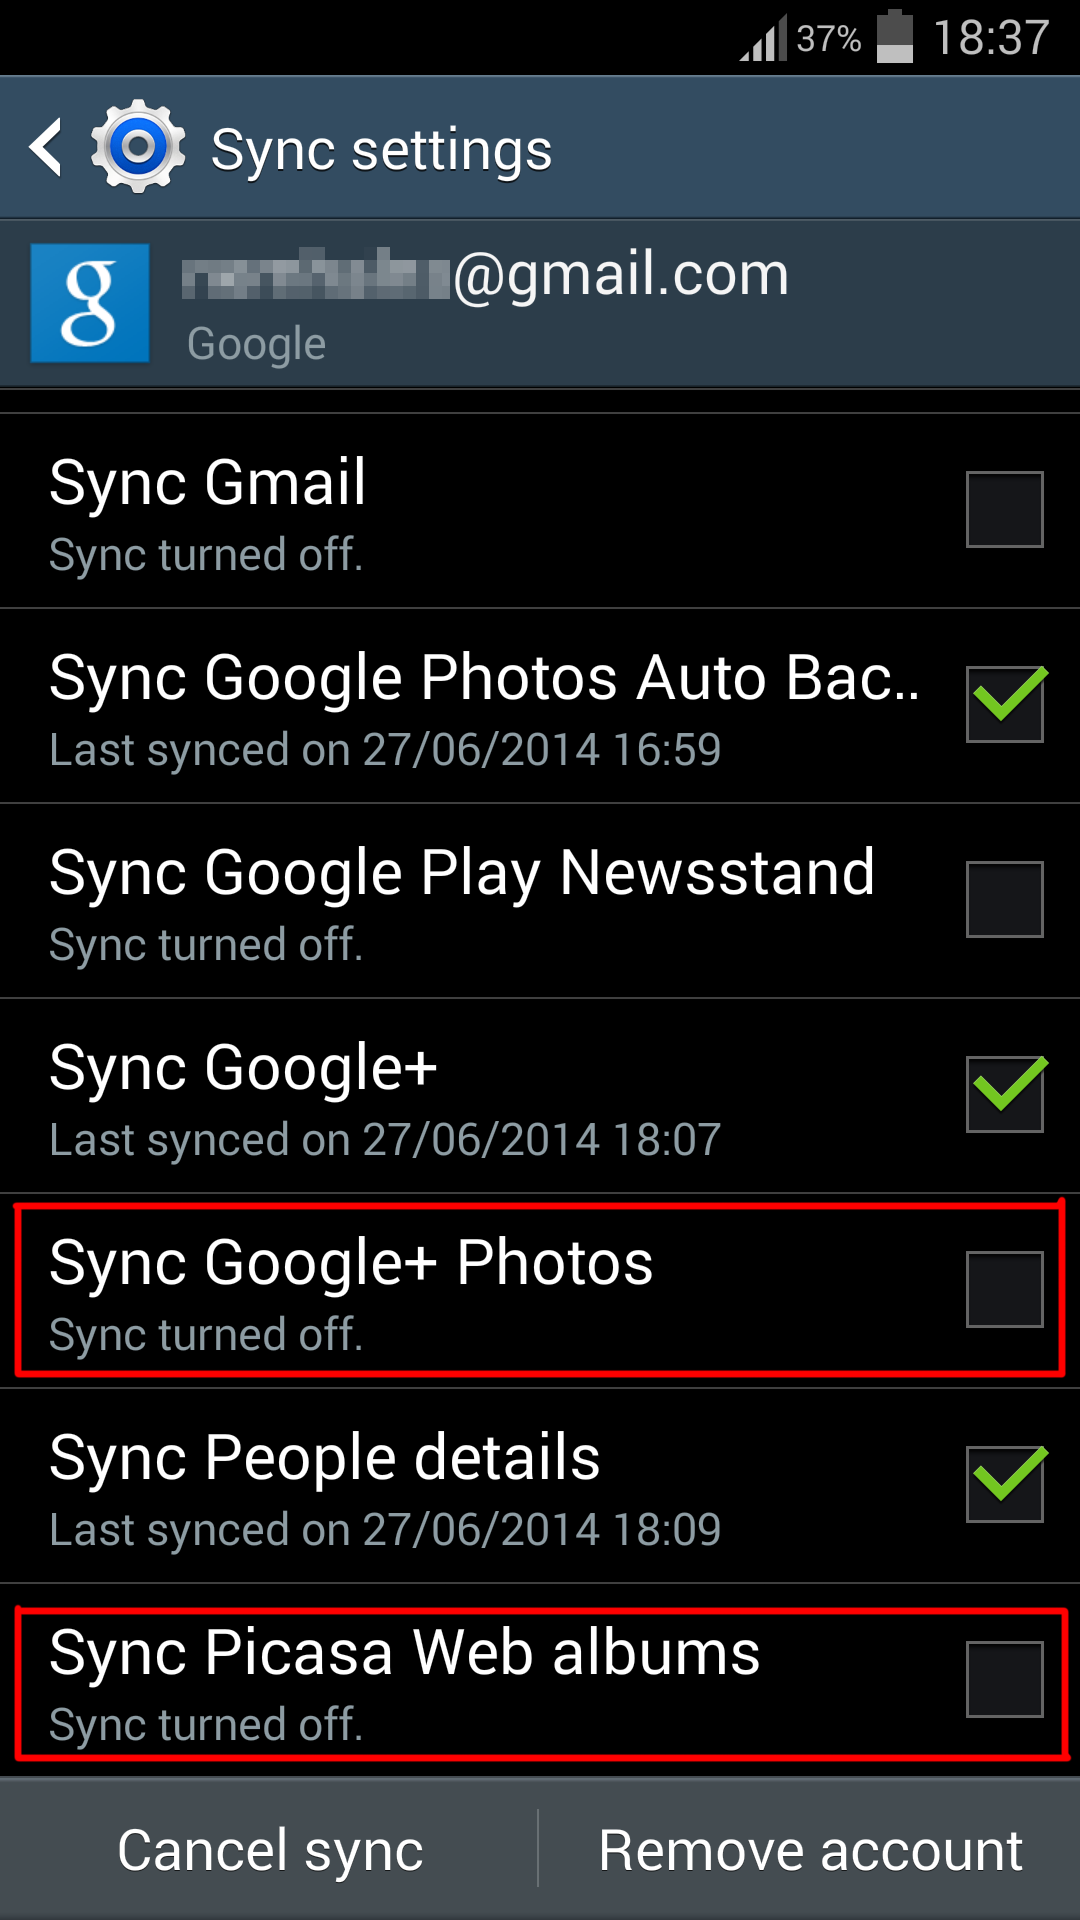
2. On the next page disable Sync Picasa Web albums (and you can also disable Sync Google+ Photos)
That will prevent future pictures from being downloaded from Picasa to your phone, now let’s clear the current ones:
0. NOTE: If you have the phone running on latest Android (Marshmallow) please scroll down since this changed a bit so following three steps are slightly different now.
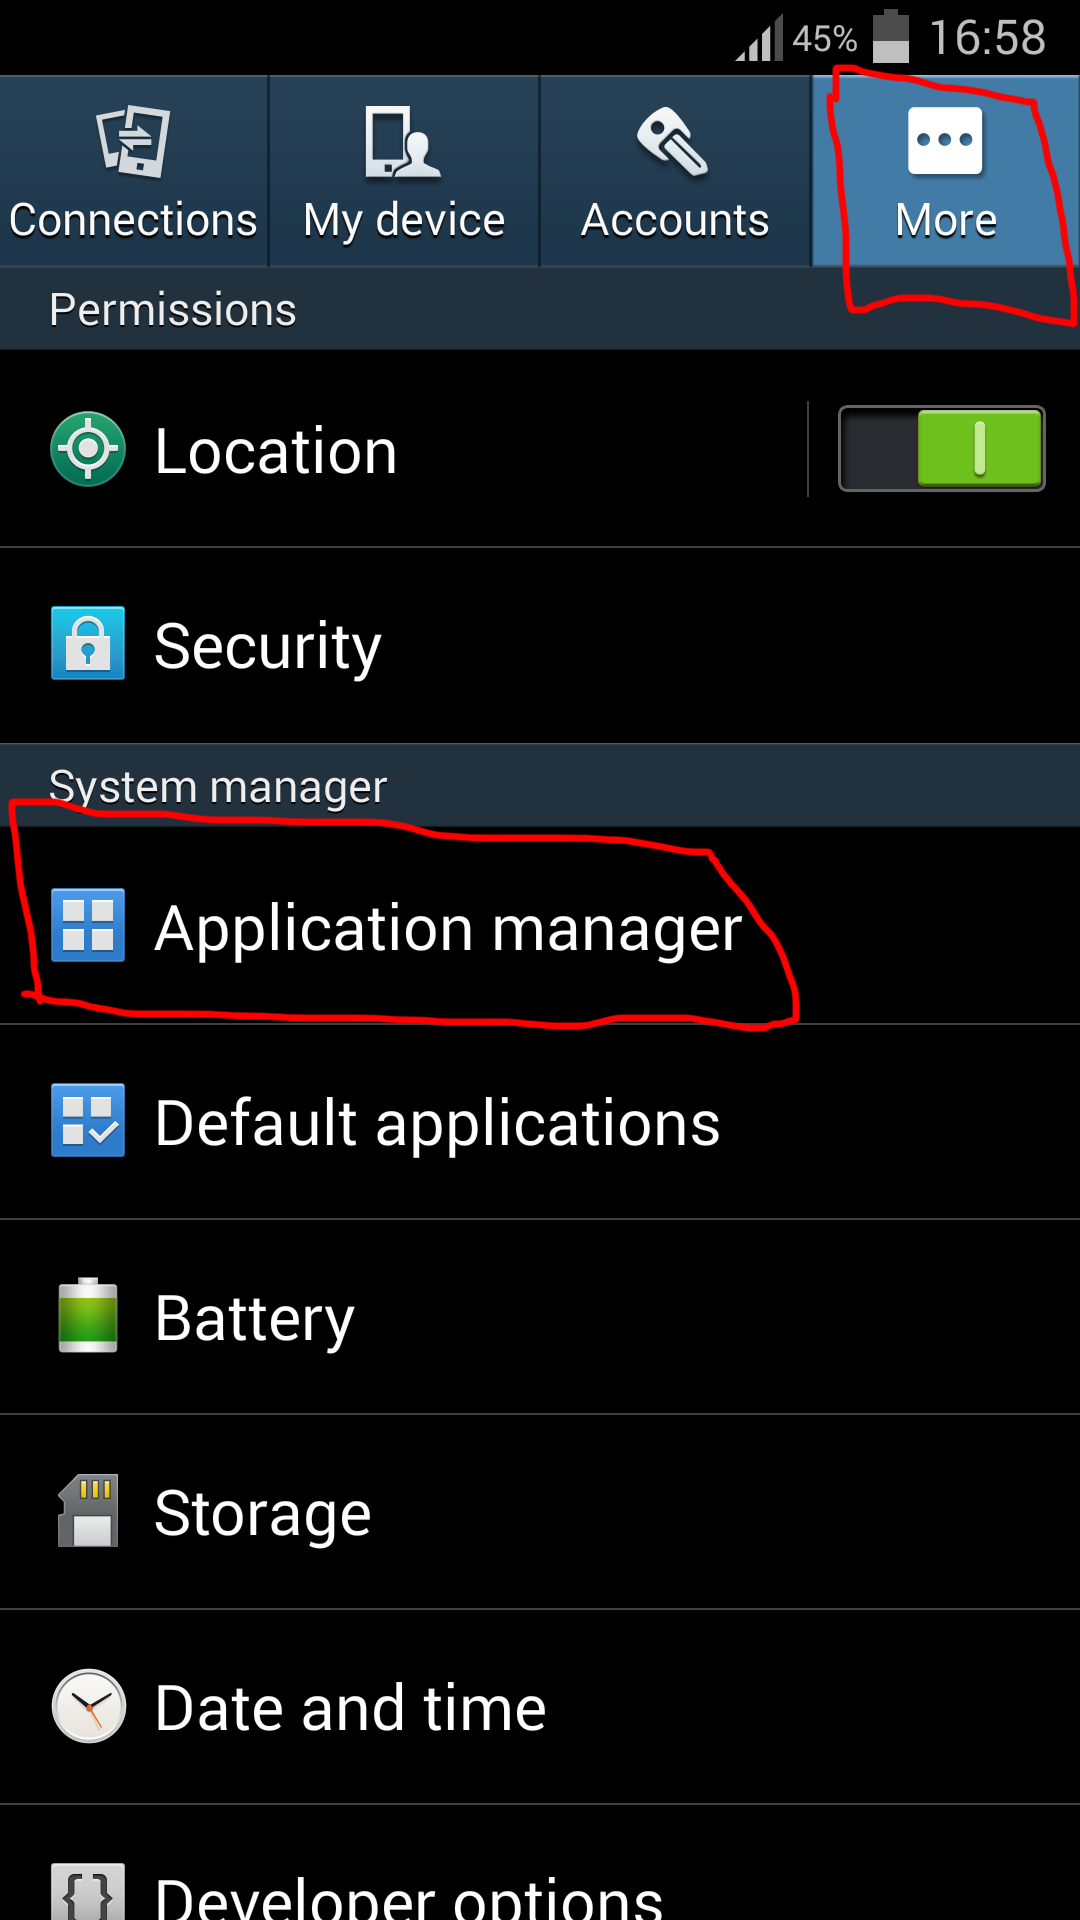
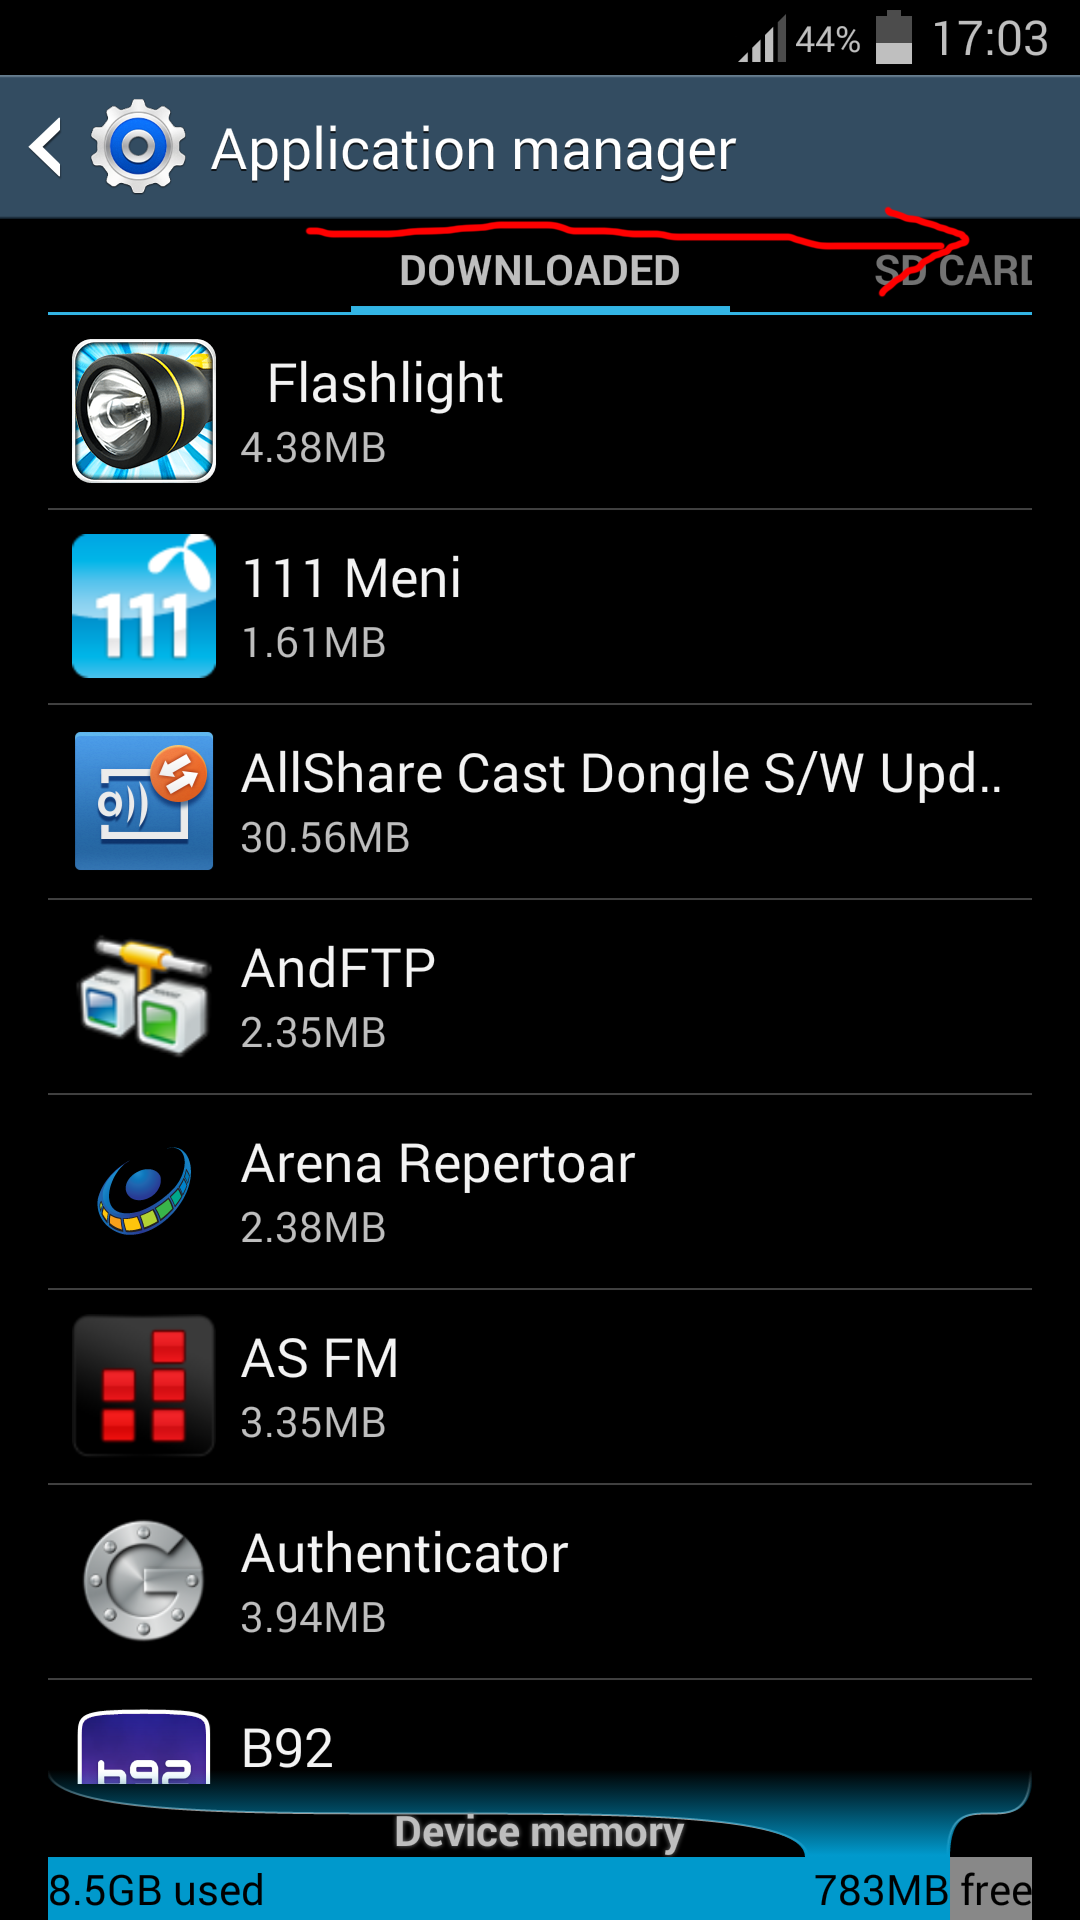
1. Go to Settings and at More tab enter Application Manager
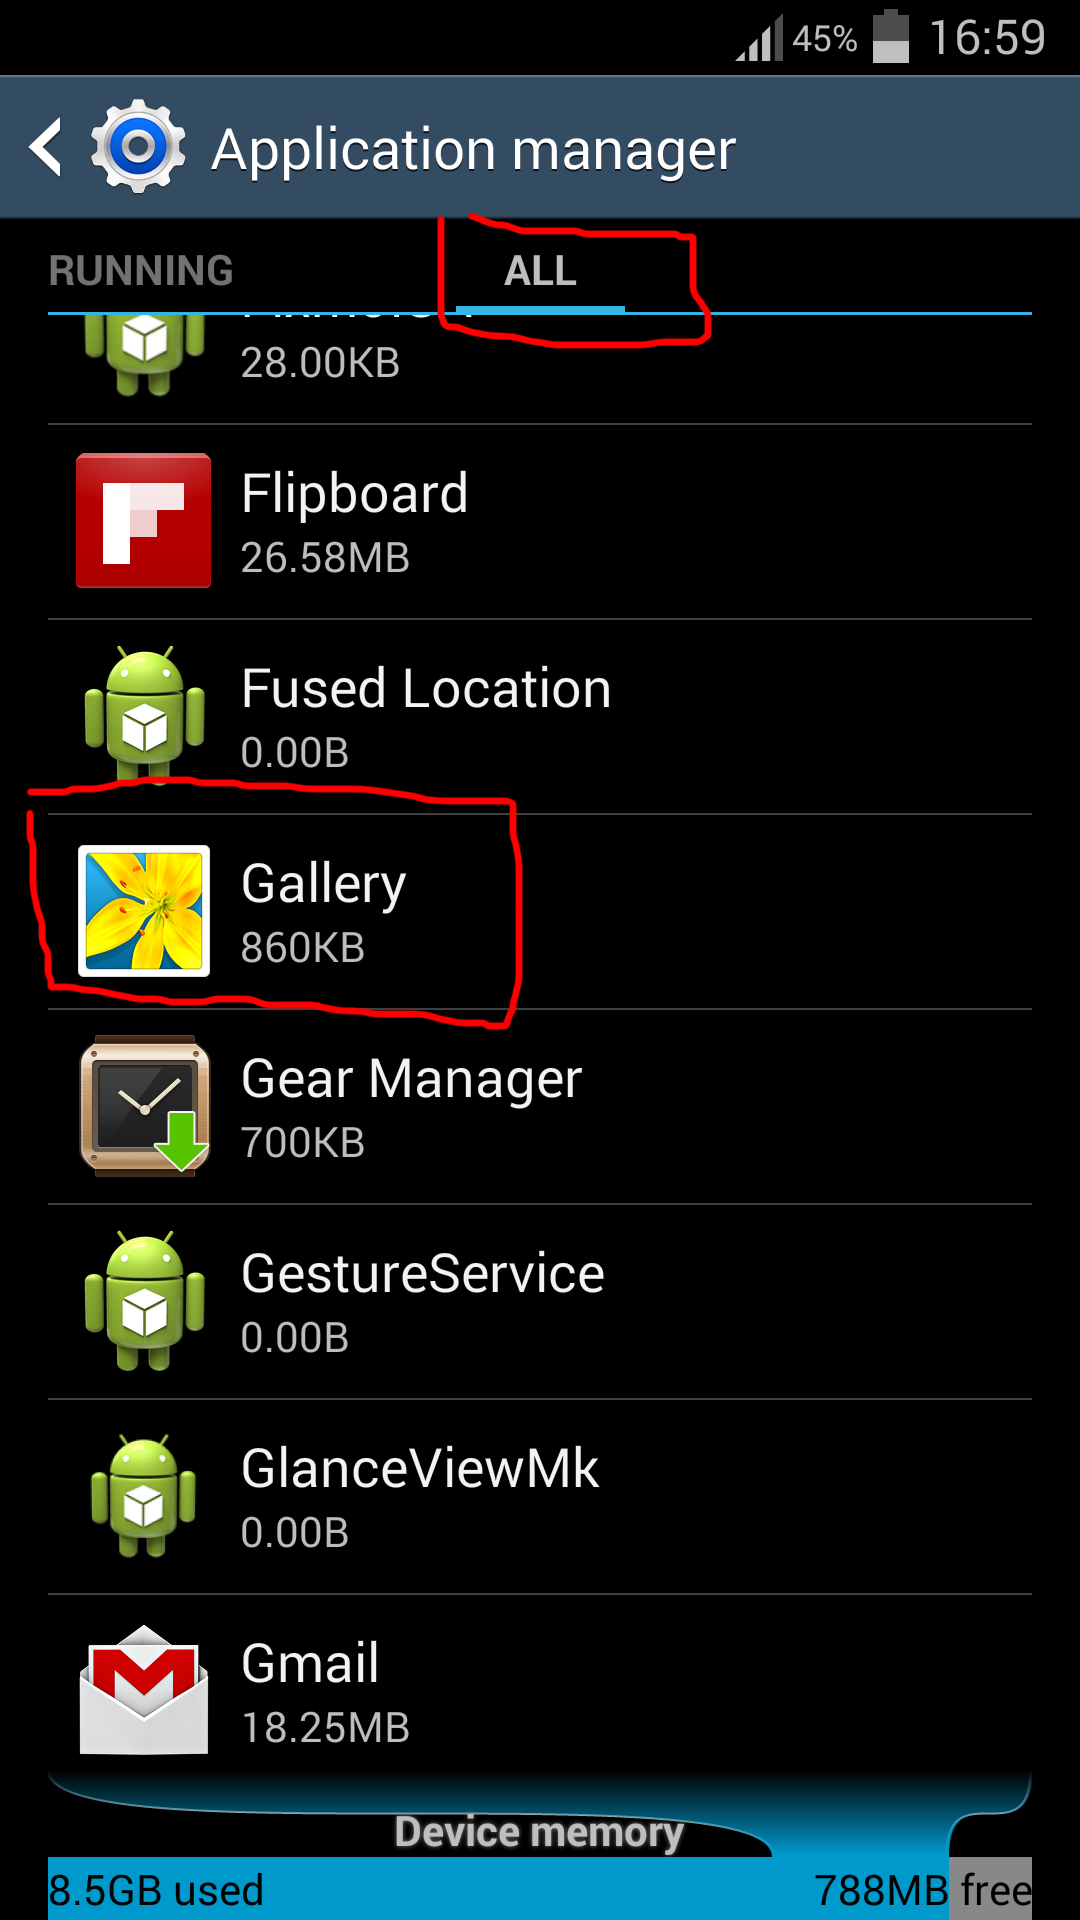
2. Once you’re into Application Manager at the top go trough the tabs above until you reach move the tab All
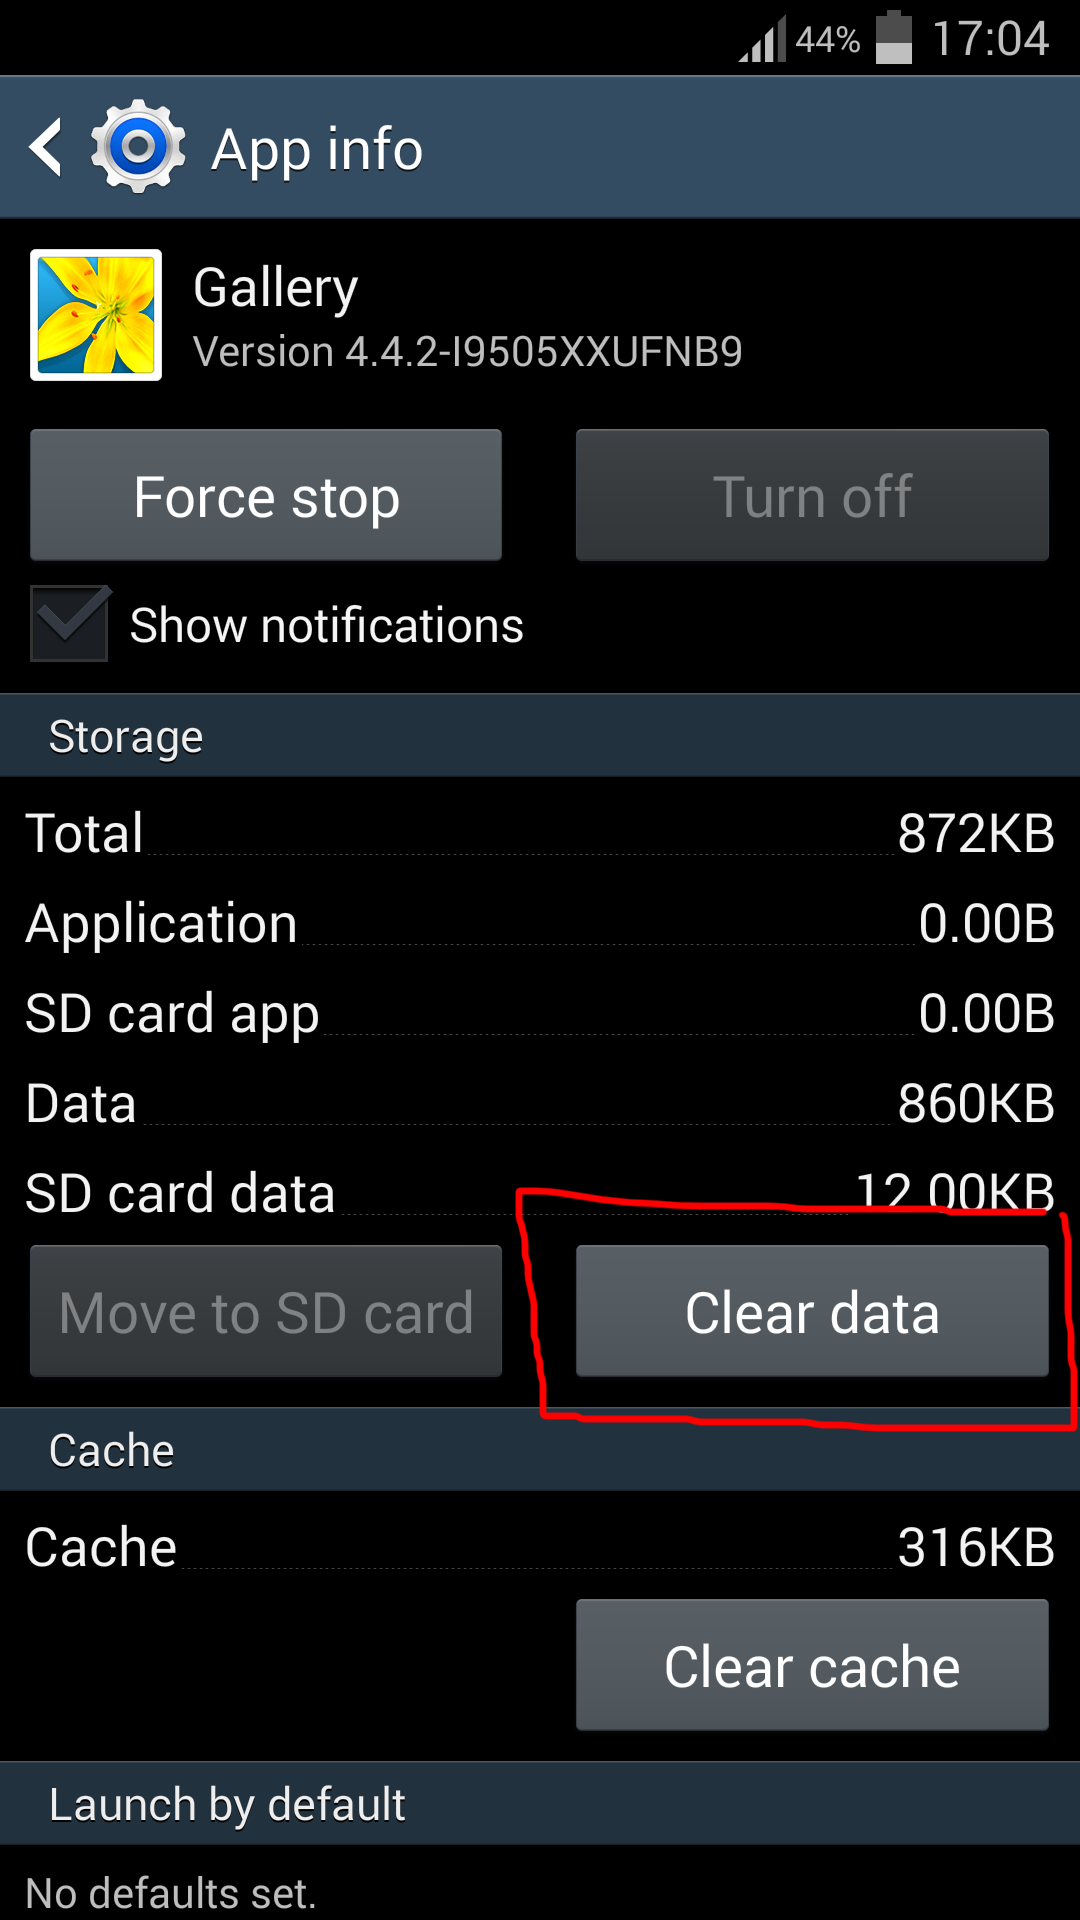
3. Then and find Gallery application, click on it and then click on Clear Data button and confirm.
Now you will no longer have Picasa pictures in your Gallery on your Samsung Galaxy S4 (SGS4) phone. This guide also works on Samsung Galaxy S3 and Samsung Galaxy S5 and probably on some other Galaxy phones. If you have just bought a new Galaxy phone check out some cool accessories, chargers and cases for your phone:
26th July 2014 Update: Added a blog post on how to remove Facebook Albums from Gallery app on Samsung Galaxy S3 or S4.
27th June 2014 Update: I have added screenshots made with my phone to help you out disable Picasa on your Galaxy Phone even easier. If you phone is in other language switch it to English, then disable Picasa as descibed above in the post and then switch the language back to your preferred language. This will minimize chance of making an error.
29th September 2016 Update: Users of newer devices running on latest Android (Marshmallow) should use this guide:
If you own Samsung Galaxy S3 and you would like to speed up of your phone here are a few simple tricks that will make your S3 faster.
Tweak Animation Speed
- Open the Settings menu on your Galaxy S3.
- Browse to Developer Options and change the values of both Window Animation Scale and Transition Animation Scale to 0.5x or even better to 0.
That’s it! Your Galaxy S3 animations should now run remarkably faster and punchier than ever before. (This will also work on Samsung Galaxy S2).
Turn off S-Voice Feature
S-Voice is a feature that automatically receives phone calls, sets an alarm, and dials calls for you using your voice commands. Though this feature is enabled by default, it can be turned off to reduce memory and processor usage on your handset. Here are the steps to disable the feature:
- Open S-voice app.
- Go to S-voice settings.
- Click Turn Off S-voice “Open via the home key“
Slow Gallery
Browsing pictures and opening Gallery can take some time (on phone with lots of pictures and clips even 5-10 seconds since it has to go trough all of them). To speed that up you can install application called QuickPic and if you can adapt to use this application instead of built in gallery you’ll find it much more faster and easier to use. (This app could be also installed on Samsung Galaxy S2).
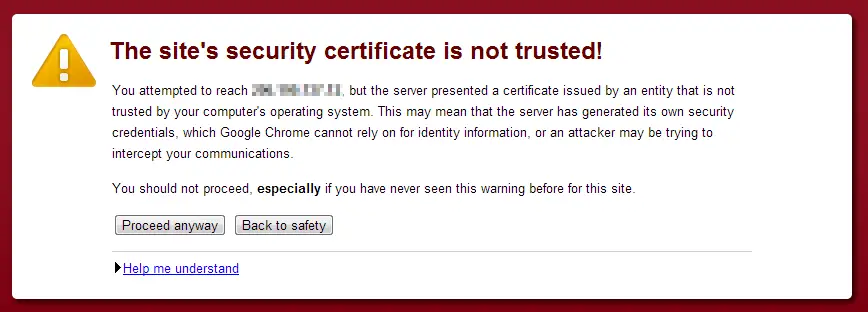
Untrusted certificate
If you just bought your new server powered with cPanel/WHM and you went to login at WHM/cPanel using secure connection (https://) and got that red error saying that certificate can not be trusted.

You can just press “Proceed Anyway” and get to WHH, cPanel or Webmail login but that will just bypass it but it becomes quite annoying.
The Solution
Well there are two actually. First one includes buying SSL Certificate and those come at price from about $10 to few hundred bucks per year. If you sell hosting – I would recommend buying and installing one – but if you’re using the server alone – you can do it this way:
1. Login to cPanel/WHM (you’re clicking “Proceed Anyway” button for the last time I promise 🙂 )
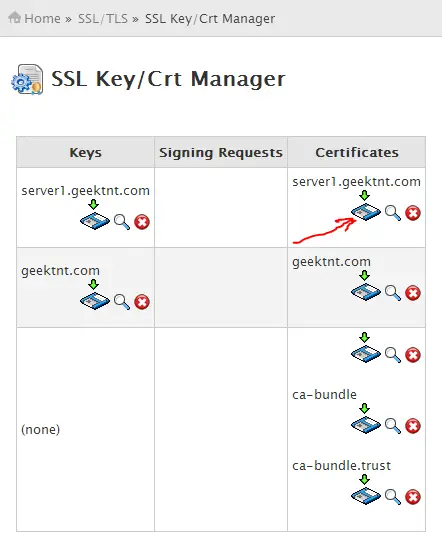
2. Go to SSL/TLS and select SSL Key/Crt Manager in the menu
3. In the Certificates find the your host and download click the download button/icon:
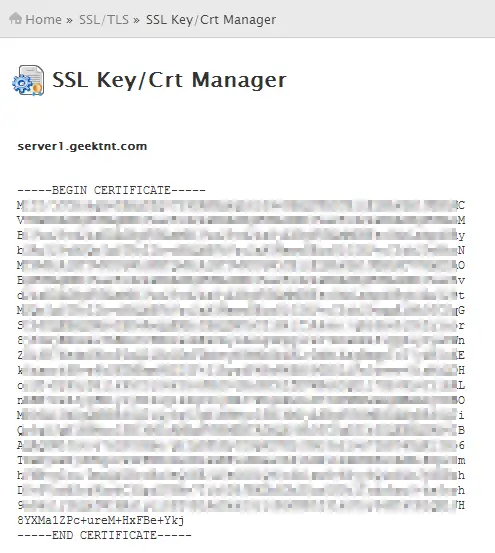
4. Copy everything from (including) —–BEGIN CERTIFICATE—– to (including) —–END CERTIFICATE—– and paste it in a notepad and save that as whmcert.crt on desktop.
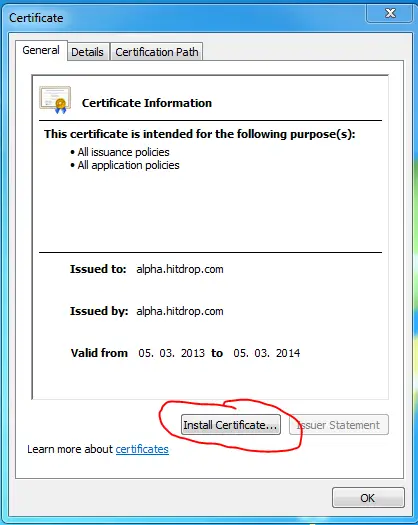
5. Double click on that file you have just saved/created and click on Install Certificate button.
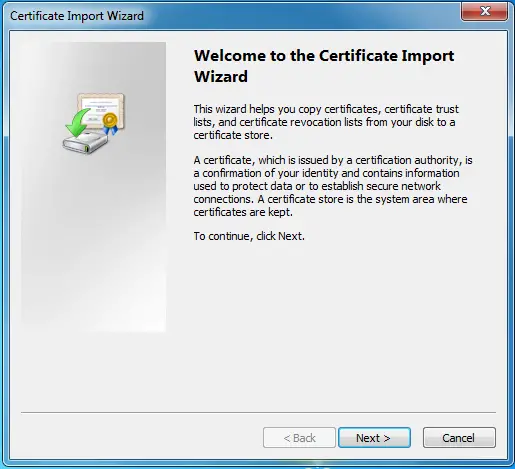
6. Just click Next > 🙂
7. This is important step for all Windows Vista, Windows 7 and Windows 8 users. Select Place all certificates in following store then click Browse and in new small windows select Trusted Root Certificate Authorities, press OK and Next >
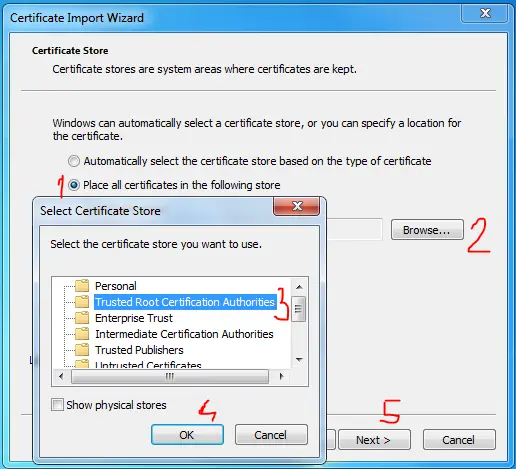
8. Press Finish
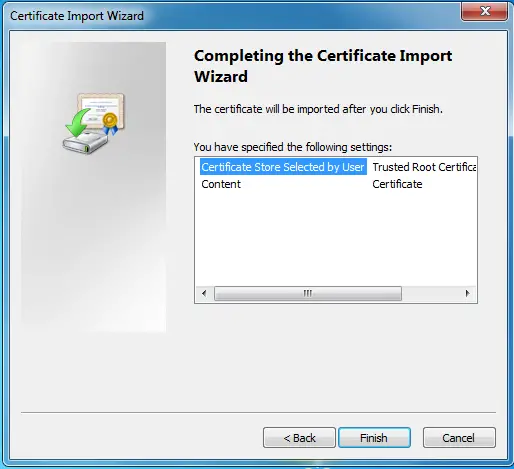
9. Restart the browser
10. Navigate to WHM, cPanel or Webmail secure login and you should no longer have that red error warning!
As I’ve said if you’re in hosting business – don’t be cheap buy a real SSL and install it. If you share server with a friend(s) or a business partner(s) just zip that whmcert.crt and email it to them and email them this article as a guide how to install the certificate. They have to do it from point 5. to point 10. Hope this helps!