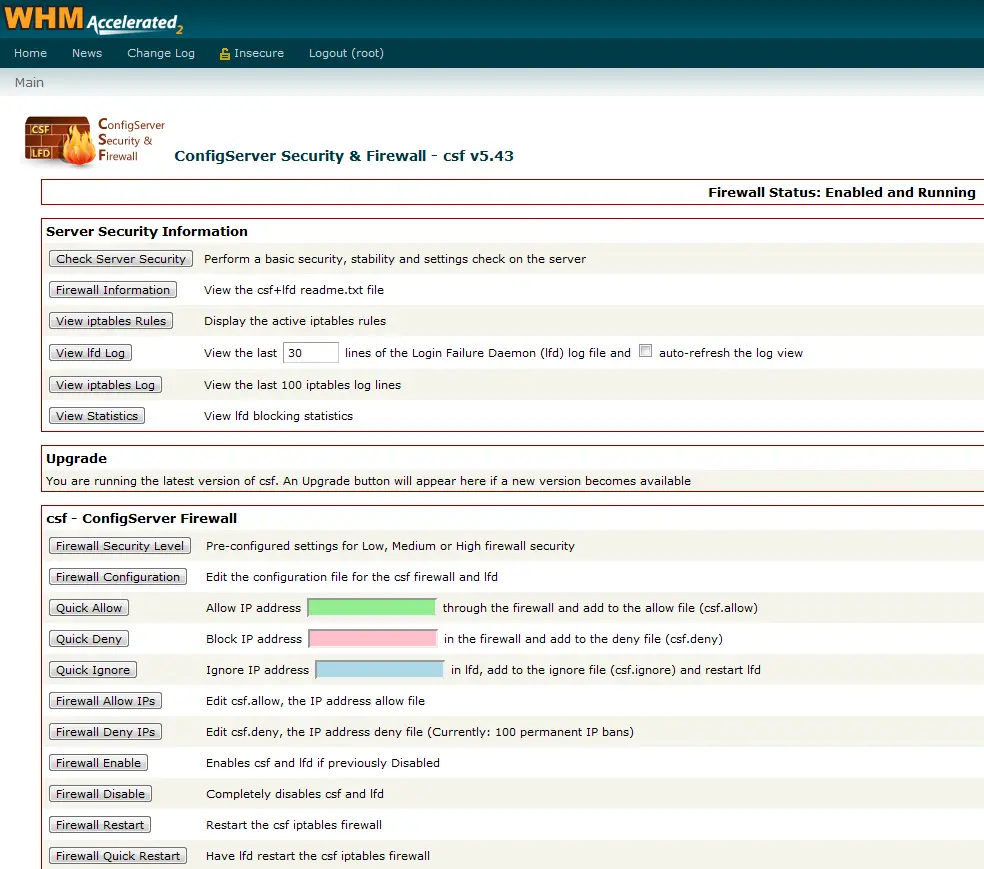
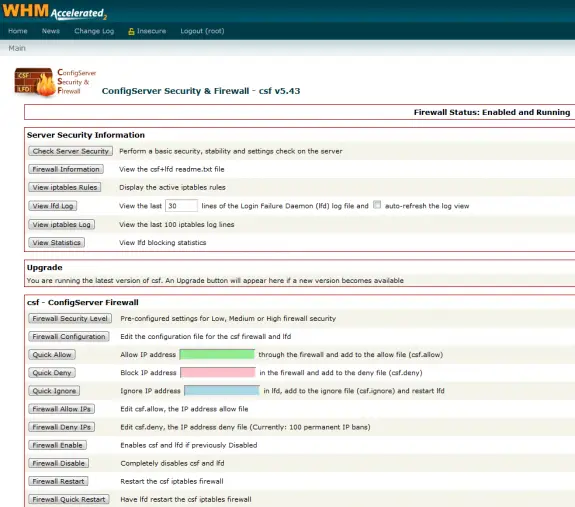
In order to protect your server the best way possible, beside running iptables you should install some additional software. I can recommend ConfigServer Security & Firewall. I’m using it on couple of servers right now and it’s prove it self to be stable and low on resource usage. It also has WHM/cPanel plugin that helps you managing your firewall even if you’re not very experienced user/admnin.
Before installing you must be sure that you do not have any other firewalls installed (such as APF)
Installation is really simple. You just need to run those couple of commands in SSH:
cd /usr/local/src
wget https://download.configserver.com/csf.tgz
tar -xzf csf.tgz
cd csf
sh install.sh
Don’t forget to disable testing flag by setting TESTING = 0.
You can do that easily in WHM/cPanel: after logging in at WHM and in Plugins section of sidebar you’ll find “ConfigServer Security&Firewall”. Then click on Firewall Configuration and change testing value. Save it and restart firewall and there you go! Your CSF firewall is up and running!
Continue Reading →
Today I a customer of mine came to me with a problem with web site that he have just moved from one host to another. And on that new host all his links on his site suddenly had ?PHPSESSID=k234j2knk… in the end. Since that is totally unusable since that site doesn’t even uses sessions and could affect his search engine rankings, he wanted it out of the way. The new host he moved that site to was shared and it doesn’t allow editing of php.ini any way so I had to make some other solution.
After failing with adding one of those on top of php files, as suggested on most pages that I found on Google:
// stop PHP from automatically embedding PHPSESSID on local URLs
ini_set('session.use_trans_sid', false);

// only use cookies (no url based sessions)
ini_set('session.use_only_cookies', true);
I suggested him to just switch hosts again, but he said he already paid up front for the whole year… and that it’s not an option… and that he wants that off his site… So, I’ve Googled some more and finally found a simple solution (that doesn’t require editing of 100’s of files in his case because of poorly programmed site). All I had to do is just put one line of code in .htaccess file and BOOM! All those nasty ?PHPSESSID were gone!
php_flag session.use_trans_sid off
 Everyone of us probably has hundreds if not thousands of images taken with his digital camera or cell phone. When viewing these pictures on computer (or TV) you will find that lots of pictures needs to be rotated to be displayed correctly. Doing this by hand can really take some time. Luckily, I have found an easier way of solving this problem. It’s also very fast and easy to use!
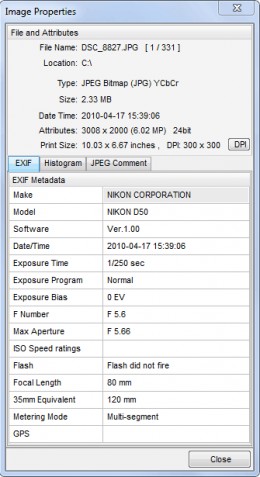
Most of modern digital cameras (and cellphones) save many extra data to JPEG. That’s called EXIF data. Many useful information about how the picture was taken is stored in there. In sample I provided on the right you can see part of the EXIF data saying that the picture was made using my Nikon D50, that I didn’t use the flash and that exposure time is 1/250 sec and that focal length was 80mm. Beside that, there are many other details that are not displayed in this sample, and among those is Orientation tag that says how the camera was positioned in time of shooting.
Some programs use that Orientation data to auto-rotate the images for you when viewing them – some do not.
Our mission is to rotate multiple images in batch using exif orientation without loss of quality. For that purpose I will use FastStone Image Viewer that you can download from my favorite software download site FileHorse.com. This software is free for personal use (professionals should buy a license). It’s really amazing piece of software for image manipulation (viewing, converting, cropping, re-sizing, watermarking – you name it!) and it’s very light weight one so it will run smooth even on lower spec computer.
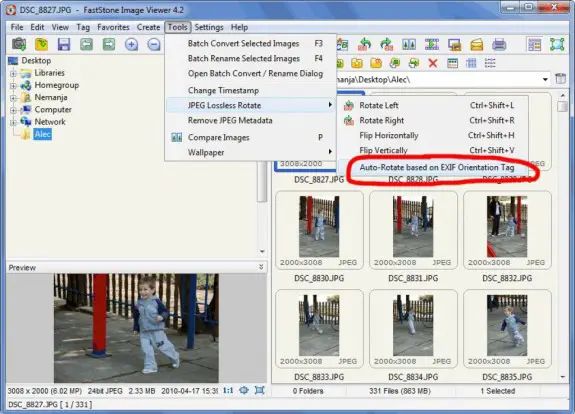
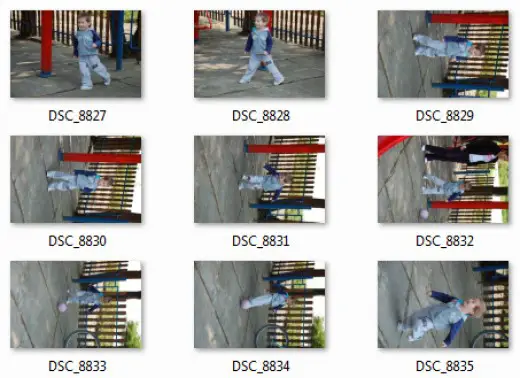
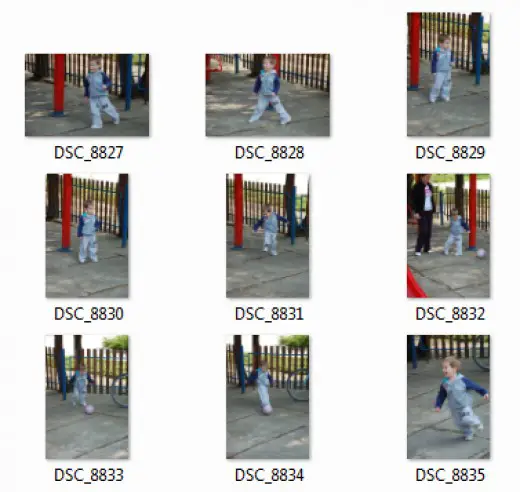
Ok, once you’ve downloaded, installed and started FastStone Image Viewer, you need to find images that you need to rotate. Once in folder with images select them by pressing CTRL+A and then go to Tools – > JPEG Lossless Rotate -> Auto-Rotate based on EXIF Orientation Tag just like on picture above. A popup will ask you are you sure you want to do it, press yes and wait until your photos are auto rotated (if you have lots of photos or slower computer it can take some time to process them all). It’s easy as 1-2-3! Take a look at the samples below:
Before Rotation
After Rotation
Feel free to leave your comments in the comment box below!
Today I went to update some plugins on one WordPress installation but then I accidentally closed the tab while update was in process. When I went back to WP admin or (to blog homepage) I was getting this error: Briefly unavailable for scheduled maintenance. Check back in a minute.
Since I couldn’t access WP Admin my hands were tied and I could do anything. So I logged in at the FTP to see how the plugins folder looks like and is something damaged.
And in pubic_html folder I noticed file .maintenance. I made backup of it and then deleted it and reloaded the blog and – IT WAS WORKING AGAIN!
And WP admin was working again!
WordPress never stops amazing me!
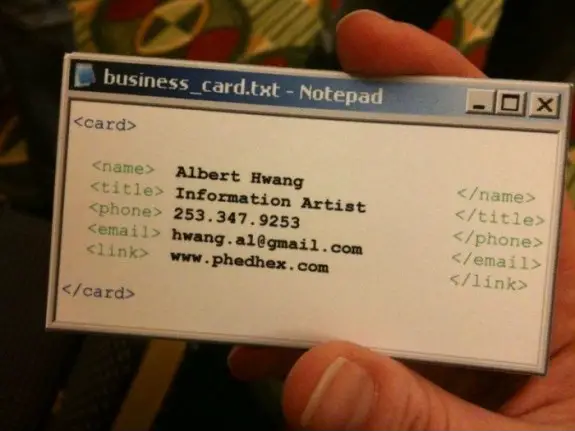
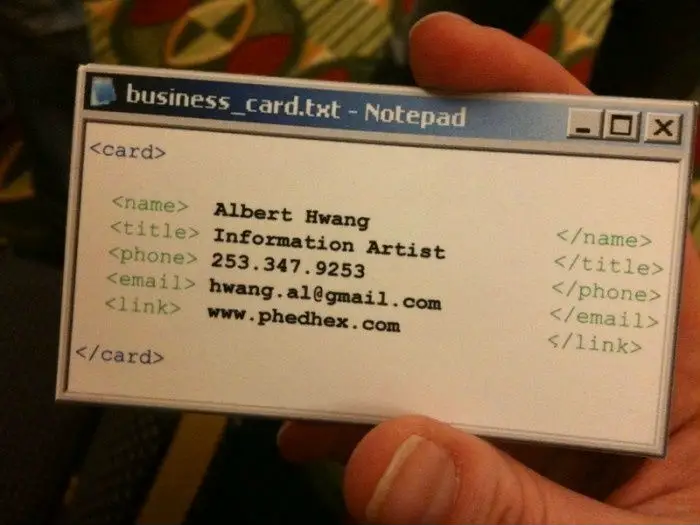
Making awesome business card is really important if you want to leave a good impression to people you plan doing business with. Here’s one great, 100% geek, business card idea…