Compressing data like html, js, css before transmitting them to the visitors can speed up your sites and save you bandwidth. Recently I have updated Apache on one server from version 2.2 to 2.4 but my mod_deflate rules won’t work any more (because of changes in the new version of Apache).
Here are my old mod_deflate rules I used on Apache 2.2:
<IfModule mod_deflate.c>
<IfModule mod_setenvif.c>
<IfModule mod_headers.c>
SetEnvIfNoCase ^(Accept-EncodXng|X-cept-Encoding|X{15}|~{15}|-{15})$ ^((gzip|deflate)\s*,?\s*)+|[X~-]{4,13}$ HAVE_Accept-Encoding
RequestHeader append Accept-Encoding "gzip,deflate" env=HAVE_Accept-Encoding
</IfModule>
</IfModule>

<IfModule filter_module>
FilterDeclare COMPRESS
FilterProvider COMPRESS DEFLATE resp=Content-Type $text/html
FilterProvider COMPRESS DEFLATE resp=Content-Type $text/css
FilterProvider COMPRESS DEFLATE resp=Content-Type $text/plain
FilterProvider COMPRESS DEFLATE resp=Content-Type $text/xml
FilterProvider COMPRESS DEFLATE resp=Content-Type $text/x-component
FilterProvider COMPRESS DEFLATE resp=Content-Type $application/javascript
FilterProvider COMPRESS DEFLATE resp=Content-Type $application/json
FilterProvider COMPRESS DEFLATE resp=Content-Type $application/xml
FilterProvider COMPRESS DEFLATE resp=Content-Type $application/xhtml+xml
FilterProvider COMPRESS DEFLATE resp=Content-Type $application/rss+xml
FilterProvider COMPRESS DEFLATE resp=Content-Type $application/atom+xml
FilterProvider COMPRESS DEFLATE resp=Content-Type $application/vnd.ms-fontobject
FilterProvider COMPRESS DEFLATE resp=Content-Type $image/svg+xml
FilterProvider COMPRESS DEFLATE resp=Content-Type $application/x-font-ttf
FilterProvider COMPRESS DEFLATE resp=Content-Type $font/opentype
FilterChain COMPRESS
FilterProtocol COMPRESS DEFLATE change=yes;byteranges=no
</IfModule>

<IfModule !mod_filter.c>
# Legacy versions of Apache
AddOutputFilterByType DEFLATE text/html text/plain text/css application/json
AddOutputFilterByType DEFLATE application/javascript
AddOutputFilterByType DEFLATE text/xml application/xml text/x-component
AddOutputFilterByType DEFLATE application/xhtml+xml application/rss+xml application/atom+xml
AddOutputFilterByType DEFLATE image/svg+xml application/vnd.ms-fontobject application/x-font-ttf font/opentype
</IfModule>
</IfModule>
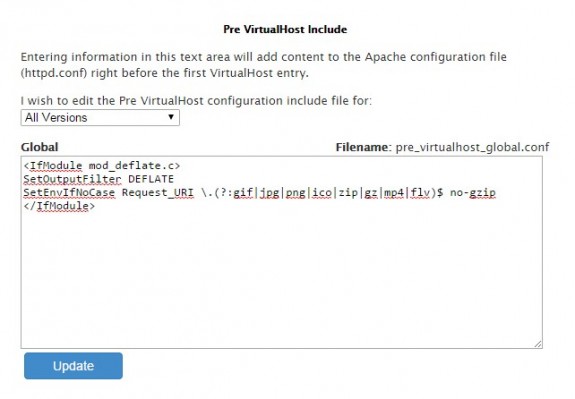
And here’s my new Apache 2.4 code that enables mod_deflate compression:
<IfModule mod_deflate.c>
SetOutputFilter DEFLATE
SetEnvIfNoCase Request_URI \.(?:gif|jpg|png|ico|zip|gz|mp4|flv)$ no-gzip
</IfModule>
Nice and easy! You can add other extensions you do not want to compress to the list above and that should be it!
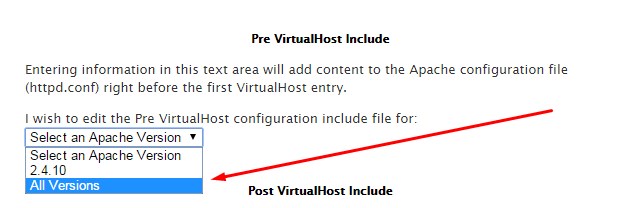
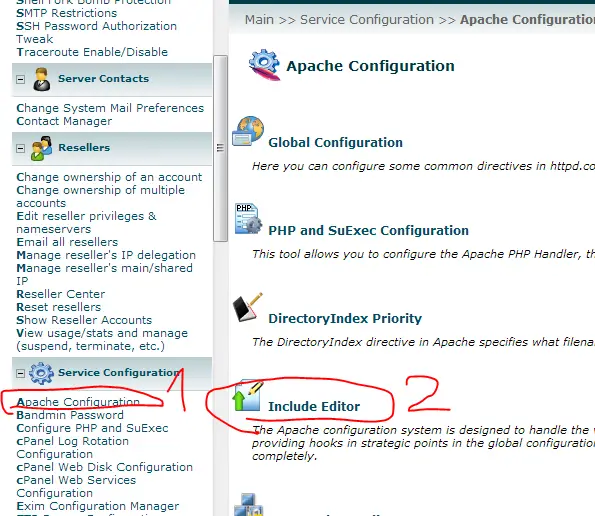
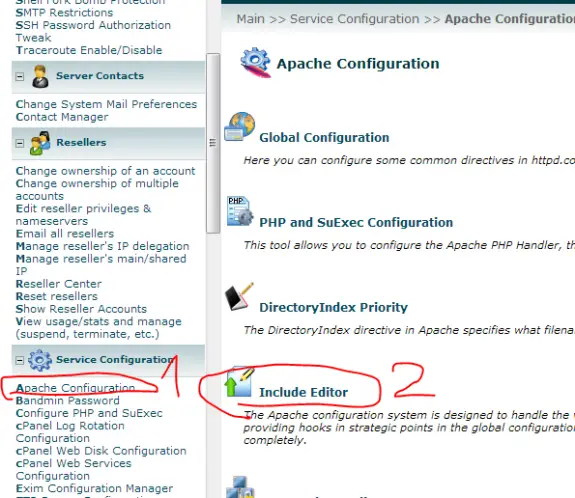
cPanel/WHM users should login to WHM then go to Service Configuration -> Apache Configuration -> Include Editor then locate Pre VirtualHost Include on the page and select All Versions from the list (or current version of the Apache in my case 2.4.10).

Then simply copy paste the code above into the box, save and restart the Apache service.
Note: The process is same for Apache 2.2 just use the appropriate code from above.
Streaming MP4 files with Apache + h264_streaming has never been easier. Setup your web server to stream MP4 files using Apache in just 3 minutes.
cd /usr/local/src
wget http://h264.code-shop.com/download/apache_mod_h264_streaming-2.2.7.tar.gz
cd mod_h264_streaming-2.2.7
./configure --with-apxs='which apxs'
make && make install
Non WHM/cPanel users
Should now add those two lines into httpd.conf:
LoadModule h264_streaming_module /usr/local/apache/modules/mod_h264_streaming.so
AddHandler h264-streaming.extensions .mp4
and simply restart Apache using:
service httpd restart
WHM/cPanel users
Should use Include Editor since any changes made to httpd.conf will be lost in case of rebuilding apache.
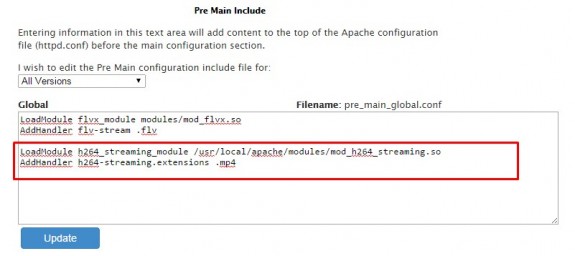
So login to WHM and go to Apache Configuration -> Include Editor -> Pre Main Include -> All Versions and in the box that appears copy/paste following two lines and after saving that confirm Apache restart.
LoadModule flvx_module modules/mod_flvx.so
AddHandler flv-stream .flv
Here are a few pictures for newbies so they can find their way trough more easily:
1. Apache Configuration
2. Include Editor
3. Locate PreMain Include – select All Versions
4. Copy/paste those two lines and press Update (then confirm Apache reload)
That’s it!
FLV Streaming using Apache
To learn how to setup FLV streaming using Apache click here
Tags: apache mp4
To disable directory browsing/listing on whole server, follow these simple instructions:
1. Log into WHM
2. Service Configuration –> Apache Configuration
3. Global Configuration
4. Scroll down to Directory ‘/’ Options
5. Un-tick Indexes option (see picture)
6. Then press Save button below
7. Finally, rebuild by clicking rebuild apache conf button and that’s it…

There are two ways to install IonCubeLoader on cPanel. The standard way includes recompiling Apache using EasyApache from WHM (or shell) and it takes 10-30 minutes to complete and results in Apache restart in the end.
But there’s also a quick way: just login to SSH and execute this command, wait a minute and that’s it!
/scripts/phpextensionmgr install IonCubeLoader
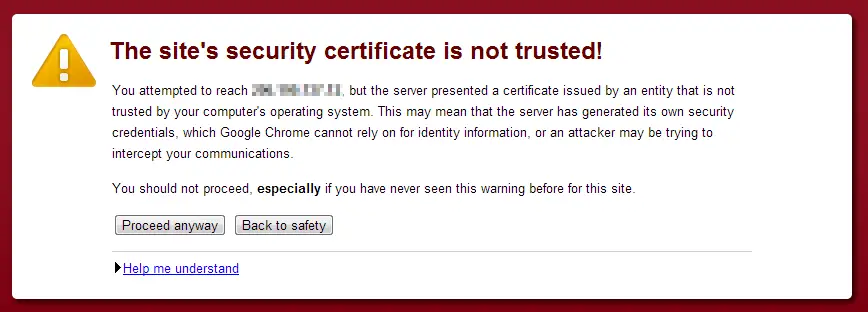
Untrusted certificate
If you just bought your new server powered with cPanel/WHM and you went to login at WHM/cPanel using secure connection (https://) and got that red error saying that certificate can not be trusted.

You can just press “Proceed Anyway” and get to WHH, cPanel or Webmail login but that will just bypass it but it becomes quite annoying.
The Solution
Well there are two actually. First one includes buying SSL Certificate and those come at price from about $10 to few hundred bucks per year. If you sell hosting – I would recommend buying and installing one – but if you’re using the server alone – you can do it this way:
1. Login to cPanel/WHM (you’re clicking “Proceed Anyway” button for the last time I promise 🙂 )
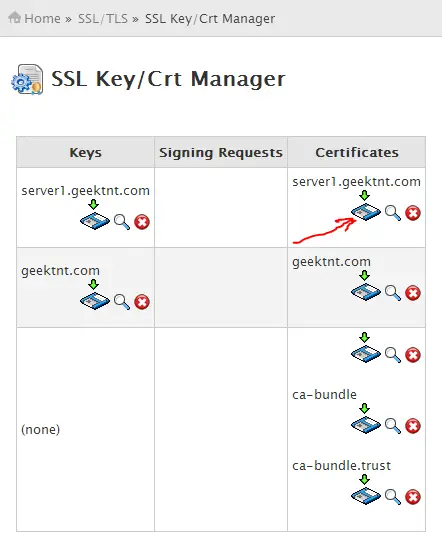
2. Go to SSL/TLS and select SSL Key/Crt Manager in the menu
3. In the Certificates find the your host and download click the download button/icon:
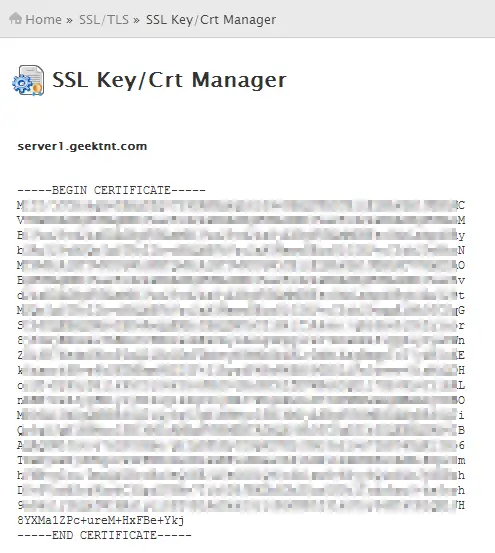
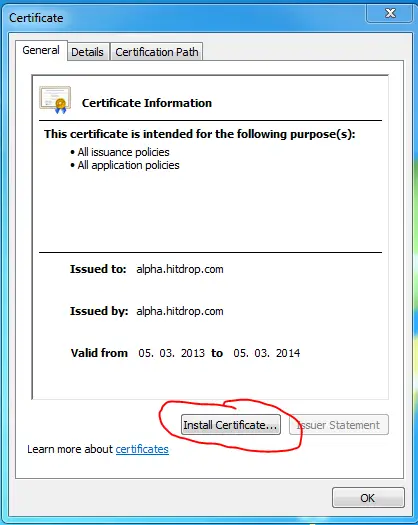
4. Copy everything from (including) —–BEGIN CERTIFICATE—– to (including) —–END CERTIFICATE—– and paste it in a notepad and save that as whmcert.crt on desktop.
5. Double click on that file you have just saved/created and click on Install Certificate button.
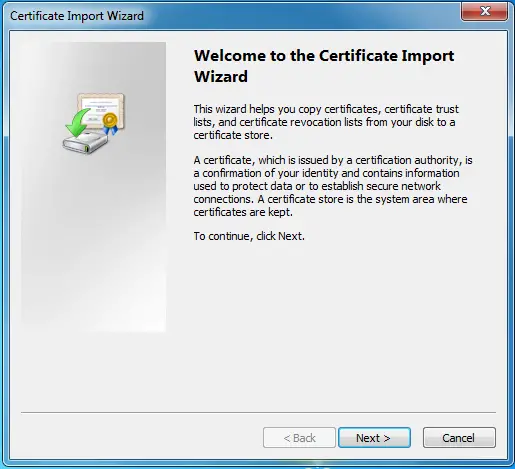
6. Just click Next > 🙂
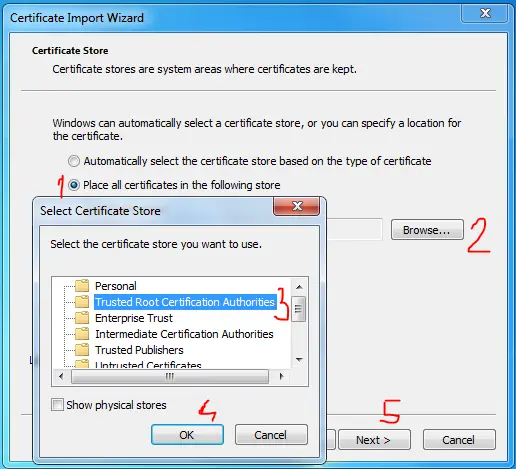
7. This is important step for all Windows Vista, Windows 7 and Windows 8 users. Select Place all certificates in following store then click Browse and in new small windows select Trusted Root Certificate Authorities, press OK and Next >
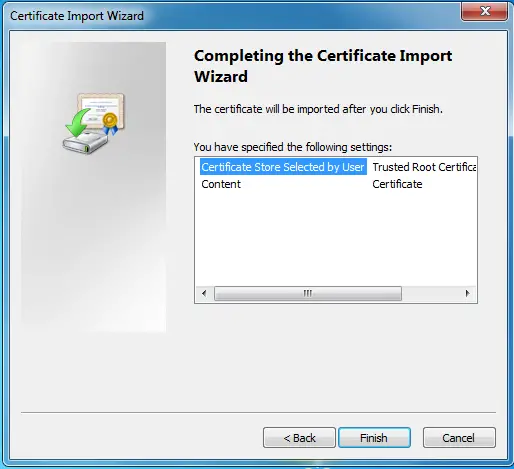
8. Press Finish
9. Restart the browser
10. Navigate to WHM, cPanel or Webmail secure login and you should no longer have that red error warning!
As I’ve said if you’re in hosting business – don’t be cheap buy a real SSL and install it. If you share server with a friend(s) or a business partner(s) just zip that whmcert.crt and email it to them and email them this article as a guide how to install the certificate. They have to do it from point 5. to point 10. Hope this helps!