If you click on the image and hit the Align Center icon inside the editor, it will give to that image a class named “aligncenter” (or left “alignleft” and right to be “alignright” in case you align it left or right) and it will look good in the editor. In some cases once you save the changes and go to check how the image looks on the site you can notice that it’s not properly aligned and instead of being centered your image is right aligned.
This issue occurs on some themes while it works fine on the other (it works nice on the default WordPress theme) and the reason for that is that the theme doesn’t define these aligncenter (or alignleft and alignright) classes in CSS. These are introduced with WordPress 2.5 so some older themes are usually lack this and thus don’t work as expected.
There are some workarounds to solve this issue, but the best one is to just edit default styles.css and add the following css classes in it:
/* =WordPress Core
-------------------------------------------------------------- */
.alignnone {
    margin: 5px 20px 20px 0;
}

.aligncenter,
div.aligncenter {
    display: block;
    margin: 5px auto 5px auto;
}

.alignright {
    float:right;
    margin: 5px 0 20px 20px;
}

.alignleft {
    float: left;
    margin: 5px 20px 20px 0;
}

a img.alignright {
    float: right;
    margin: 5px 0 20px 20px;
}

a img.alignnone {
    margin: 5px 20px 20px 0;
}

a img.alignleft {
    float: left;
    margin: 5px 20px 20px 0;
}

a img.aligncenter {
    display: block;
    margin-left: auto;
    margin-right: auto
}

.wp-caption {
    background: #fff;
    border: 1px solid #f0f0f0;
    max-width: 96%; /* Image does not overflow the content area */
    padding: 5px 3px 10px;
    text-align: center;
}

.wp-caption.alignnone {
    margin: 5px 20px 20px 0;
}

.wp-caption.alignleft {
    margin: 5px 20px 20px 0;
}

.wp-caption.alignright {
    margin: 5px 0 20px 20px;
}

.wp-caption img {
    border: 0 none;
    height: auto;
    margin: 0;
    max-width: 98.5%;
    padding: 0;
    width: auto;
}

.wp-caption p.wp-caption-text {
    font-size: 11px;
    line-height: 17px;
    margin: 0;
    padding: 0 4px 5px;
}

/* Text meant only for screen readers. */
.screen-reader-text {
	clip: rect(1px, 1px, 1px, 1px);
	position: absolute !important;
	height: 1px;
	width: 1px;
	overflow: hidden;
}

.screen-reader-text:focus {
	background-color: #f1f1f1;
	border-radius: 3px;
	box-shadow: 0 0 2px 2px rgba(0, 0, 0, 0.6);
	clip: auto !important;
	color: #21759b;
	display: block;
	font-size: 14px;
	font-size: 0.875rem;
	font-weight: bold;
	height: auto;
	left: 5px;
	line-height: normal;
	padding: 15px 23px 14px;
	text-decoration: none;
	top: 5px;
	width: auto;
	z-index: 100000; /* Above WP toolbar. */
}
You can add the code anywhere in the file, but the end of the file is probably your safe bet. Once you save the changes you can reload the site and your images should now be aligned same way as in your editor.
You made your WordPress blog using DigitalOcean 1-click apps, you have installed Jetpack WordPress plugin but you can’t activate. Instead you’re getting this message:
Error Details: The Jetpack server was unable to communicate with your site [HTTP 500]. Ask your web host if they allow connections from WordPress.com…
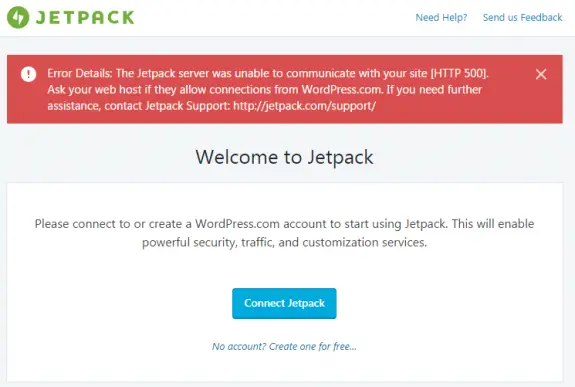
But the problem is not with the communication between WordPress.com and your DigitalOcean droplet. The problem is with the fact that following php modules were not installed: php7.0-xml and php7.0-xmlrpc.
No we can argue why these were not installed by default: it might be due the fact that this way WordPress XML-RPC will not function and this would automatically reduce the amounts of spam on your blog (more likely) or that that the system would perform (slightly) better without these two modules (less likely) but in order for JetPack to work we need to install these two modules and to restart the apache.
Here are the commands you need to execute in console in order for it to work:
sudo apt-get install php7.0-xml php7.0-xmlrpc
sudo service apache2 restart
After you have done this logout out of your WordPress, then login back again and try once again to connect your Jetpack plugin. I hope it will work out for you since it just did it for me on more than 10 different droplets!
It is known that wp-cron.php file can cause high CPU usage on high traffic WordPress sites. This can also occur on sites hosted on shared or VPS hosting when they receive more traffic than usual at short period of time (traffic spikes).
Typically, every page load calls wp-cron.php to be executed and to run any tasks that are scheduled to be executed (like posting scheduled posts, plugin or theme updates, clearing caches on various caching plugins, sending email notifications etc). This basically asks WordPress: Is it time do do anything now? And then WordPress checks for pending tasks and if there’s nothing to do typically answers with: sorry, but there’s nothing to to at this moment… Try a bit later… and this probably happens in 99% cases. So this wp-cron.php literally nags WordPress all the time with those requests. On low traffic sites, this is perfectly fine but on high traffic sites (or sites with traffic spikes) this can cause higher resource usage, make problems with your hosting (vps/server) and decrease your site performance.
Best way to prevent this wp-cron.php activity is to stop it from running the default way (on every site visit) and then just run it using cron when according your needs.
To stop WordPress from executing wp-cron.php after every page visit, simply add this single line to the end of your wp-config.php file:
define('DISABLE_WP_CRON', 'true');
That’s it! This will lower the CPU/resource usage instantly. But it’s not recommended to never execute wp-cron.php since your WordPress plugins and themes won’t be updated and your scheduled posts won’t be posted etc.
Here is the commands that you can use to run wp-cron.php using a real cron:
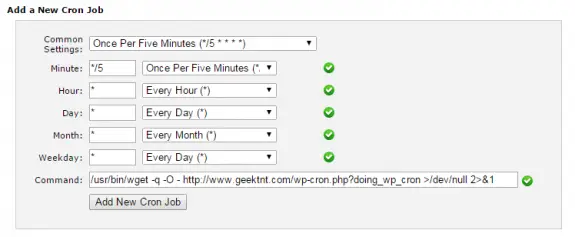
/usr/bin/wget -q -O - http://www.yoursite.com/wp-cron.php?doing_wp_cron >/dev/null 2>&1
There’s no general rule as for the frequency of this cronjob since every site and setup is different. Everything from once per day to every minute is fine but it really depends on your system. If you have tasks that run every 10 or 15 minutes you should probably setup cron to run every 5 minutes. It’s still quite frequent but it won’t happen that you get several cron runs in couple of seconds.
To setup cron at cPanel hosted site login at cPanel, click on Cron Jobs icons and there add a new cronjob like this:
While monitoring my system I have notices increased number of requests to xmlrpc.php. Every single of those requests took 200MB to 205MB of ram and resulted in system instability and in few occasions it caused my 8GB Digital Ocean Droplet to go out of memory and eventually crashed leaving all my sites not working for some 10hours or so.
Recently I’ve read that many hackers now use xmlrpc.php instead of wp-login.php to execute their brute force attacks. And the problem is – since WordPress 3.5 you can’t disable the use of xmlrpc, at least not from the WordPress control panel.
There are many ways to do that and I’ll write some:
1. Deleting xmlrpc.php file
This is really not recommended. Also after WordPress (auto)update the deleted file will be replaced so it’s not really smart to do this, but I just wanted to write this just in case someone doesn’t try to do this.
2. Plugins
There are several plugins that can do this. I found these two to be the most used ones: Disable XML-RPC and XML-RPC Pinkback. Both plugins are really basic (only couple lines of code) but they should be able to help you out and protect your blog against those attacks.
3. Adding filter to theme functions.php file
This is basically same thing as the plugin above, but you have one plugin less. All you need to do is to edit your theme’s functions.php and add these couple of lines:
function remove_x_pingback($headers) {
    unset($headers['X-Pingback']);
    return $headers;
}
add_filter('wp_headers', 'remove_x_pingback');
add_filter('xmlrpc_enabled', '__return_false');
4. Block access at .htaccess
You can simply add this one line of code to your .htaccess file and block the access to the xmlrpc.php file entirely. User accessing the xmlrpc.php will get the 403 Forbidden error.
<Files xmlrpc.php>
Order Deny,Allow
Deny from all
</Files>
5. Blocking access in nginx
If you are running nginx instead of Apache you should add this code to your nginx configuration:
server {
    location = /xmlrpc.php {
        deny all;
    }
}
6. Block on entire server
If you have one server or VPS with tens of hundreds of WordPress installations (like me) any of the solutions above will take time to implement. So the best thing to do is to block access to xmlrpc.php file on Apache level, simply by adding this to httpd.conf file:
<FilesMatch "^(xmlrpc\.php)">
Order Deny,Allow
Deny from all
</FilesMatch>
Or even better adding this code (that also blocks wp-trackback.php and also prevent’s trackback hacking attempts).
<FilesMatch "^(xmlrpc\.php|wp-trackback\.php)">
Order Deny,Allow
Deny from all
</FilesMatch>
If you don’t use XML-RPC than you can safely disable it using any of the methods above (except the first one, of-course) and protect your blog against xmlrpc hacks.
On input fields that are type “search” on HTML5 browsers add some a little blue “X” at top right side that is actually a clear button. It would clear user search input if user clicks on that “X” or if he presses ESC on keyboard. It’s a useful feature, to be sure, but for some stylish search forms it just doesn’t fit and can look quite ugly. While working on one project this became a problem and I was a looking for a way to disable it?
Here’s how it looks like on average field:
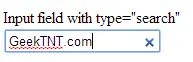
Well doesn’t look bad but if you style that box a bit it can look quite ugly…
The first solution was to simply replace type=”search” with type=”text” but that would be just too easy. And why the hell they added search type if I can’t use it! So I was looking for some other solutions. Clearly different browsers have different approaches.
To remove “X” from all search input fields in IE, simply add this to bottom of your css:
input[type=text]::-ms-clear {  display: none; width : 0; height: 0; }
input[type=text]::-ms-reveal {  display: none; width : 0; height: 0; }
To remove “X” from search input field on Chrome Browser (and all it’s mutations), simply add this to bottom of your css:
input[type="search"]::-webkit-search-decoration,
input[type="search"]::-webkit-search-cancel-button,
input[type="search"]::-webkit-search-results-button,
input[type="search"]::-webkit-search-results-decoration { display: none; }
The following CSS code should remove that clear button on all search fields on page:
input[type=text]::-ms-clear {  display: none; width : 0; height: 0; }
input[type=text]::-ms-reveal {  display: none; width : 0; height: 0; }
input[type="search"]::-webkit-search-decoration,
input[type="search"]::-webkit-search-cancel-button,
input[type="search"]::-webkit-search-results-button,
input[type="search"]::-webkit-search-results-decoration { display: none; }
I have tested this in following browsers IE, Firefox, Chrome and Opera.
Added on May 26th 2014:
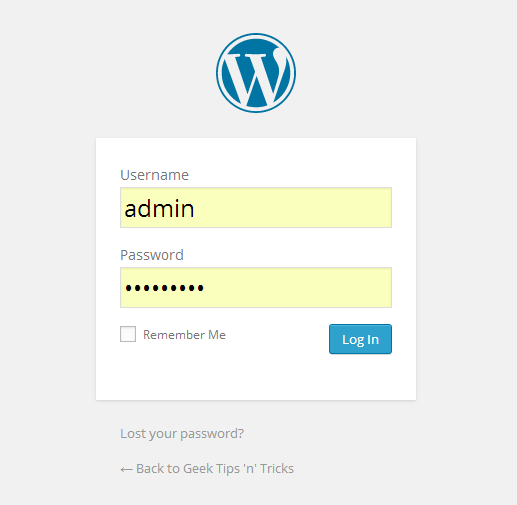
I have discovered another Chrome bug/issue that is really annoying in case you have a custom design and you don’t want Chrome to mess with it at all. It happens on all auto-complete forms where Chrome adds yellow background color to the autocomplete fields. Sample picture from WordPress loign page (but it happens on other fields too):
The solution is easy and all you need to do is to add this code into your CSS and change the color (if needed):
input:-webkit-autofill {
-webkit-box-shadow:0 0 0 50px #ffffff inset;
}
Useful links that can help you solve this problem:
If you have any questions or comments feel free to comment using the comment box below.
Tags: testing
